Jeep TJ Floating Touchscreen Car Stereo Custom Installation
Adding a touch of modern to a classic
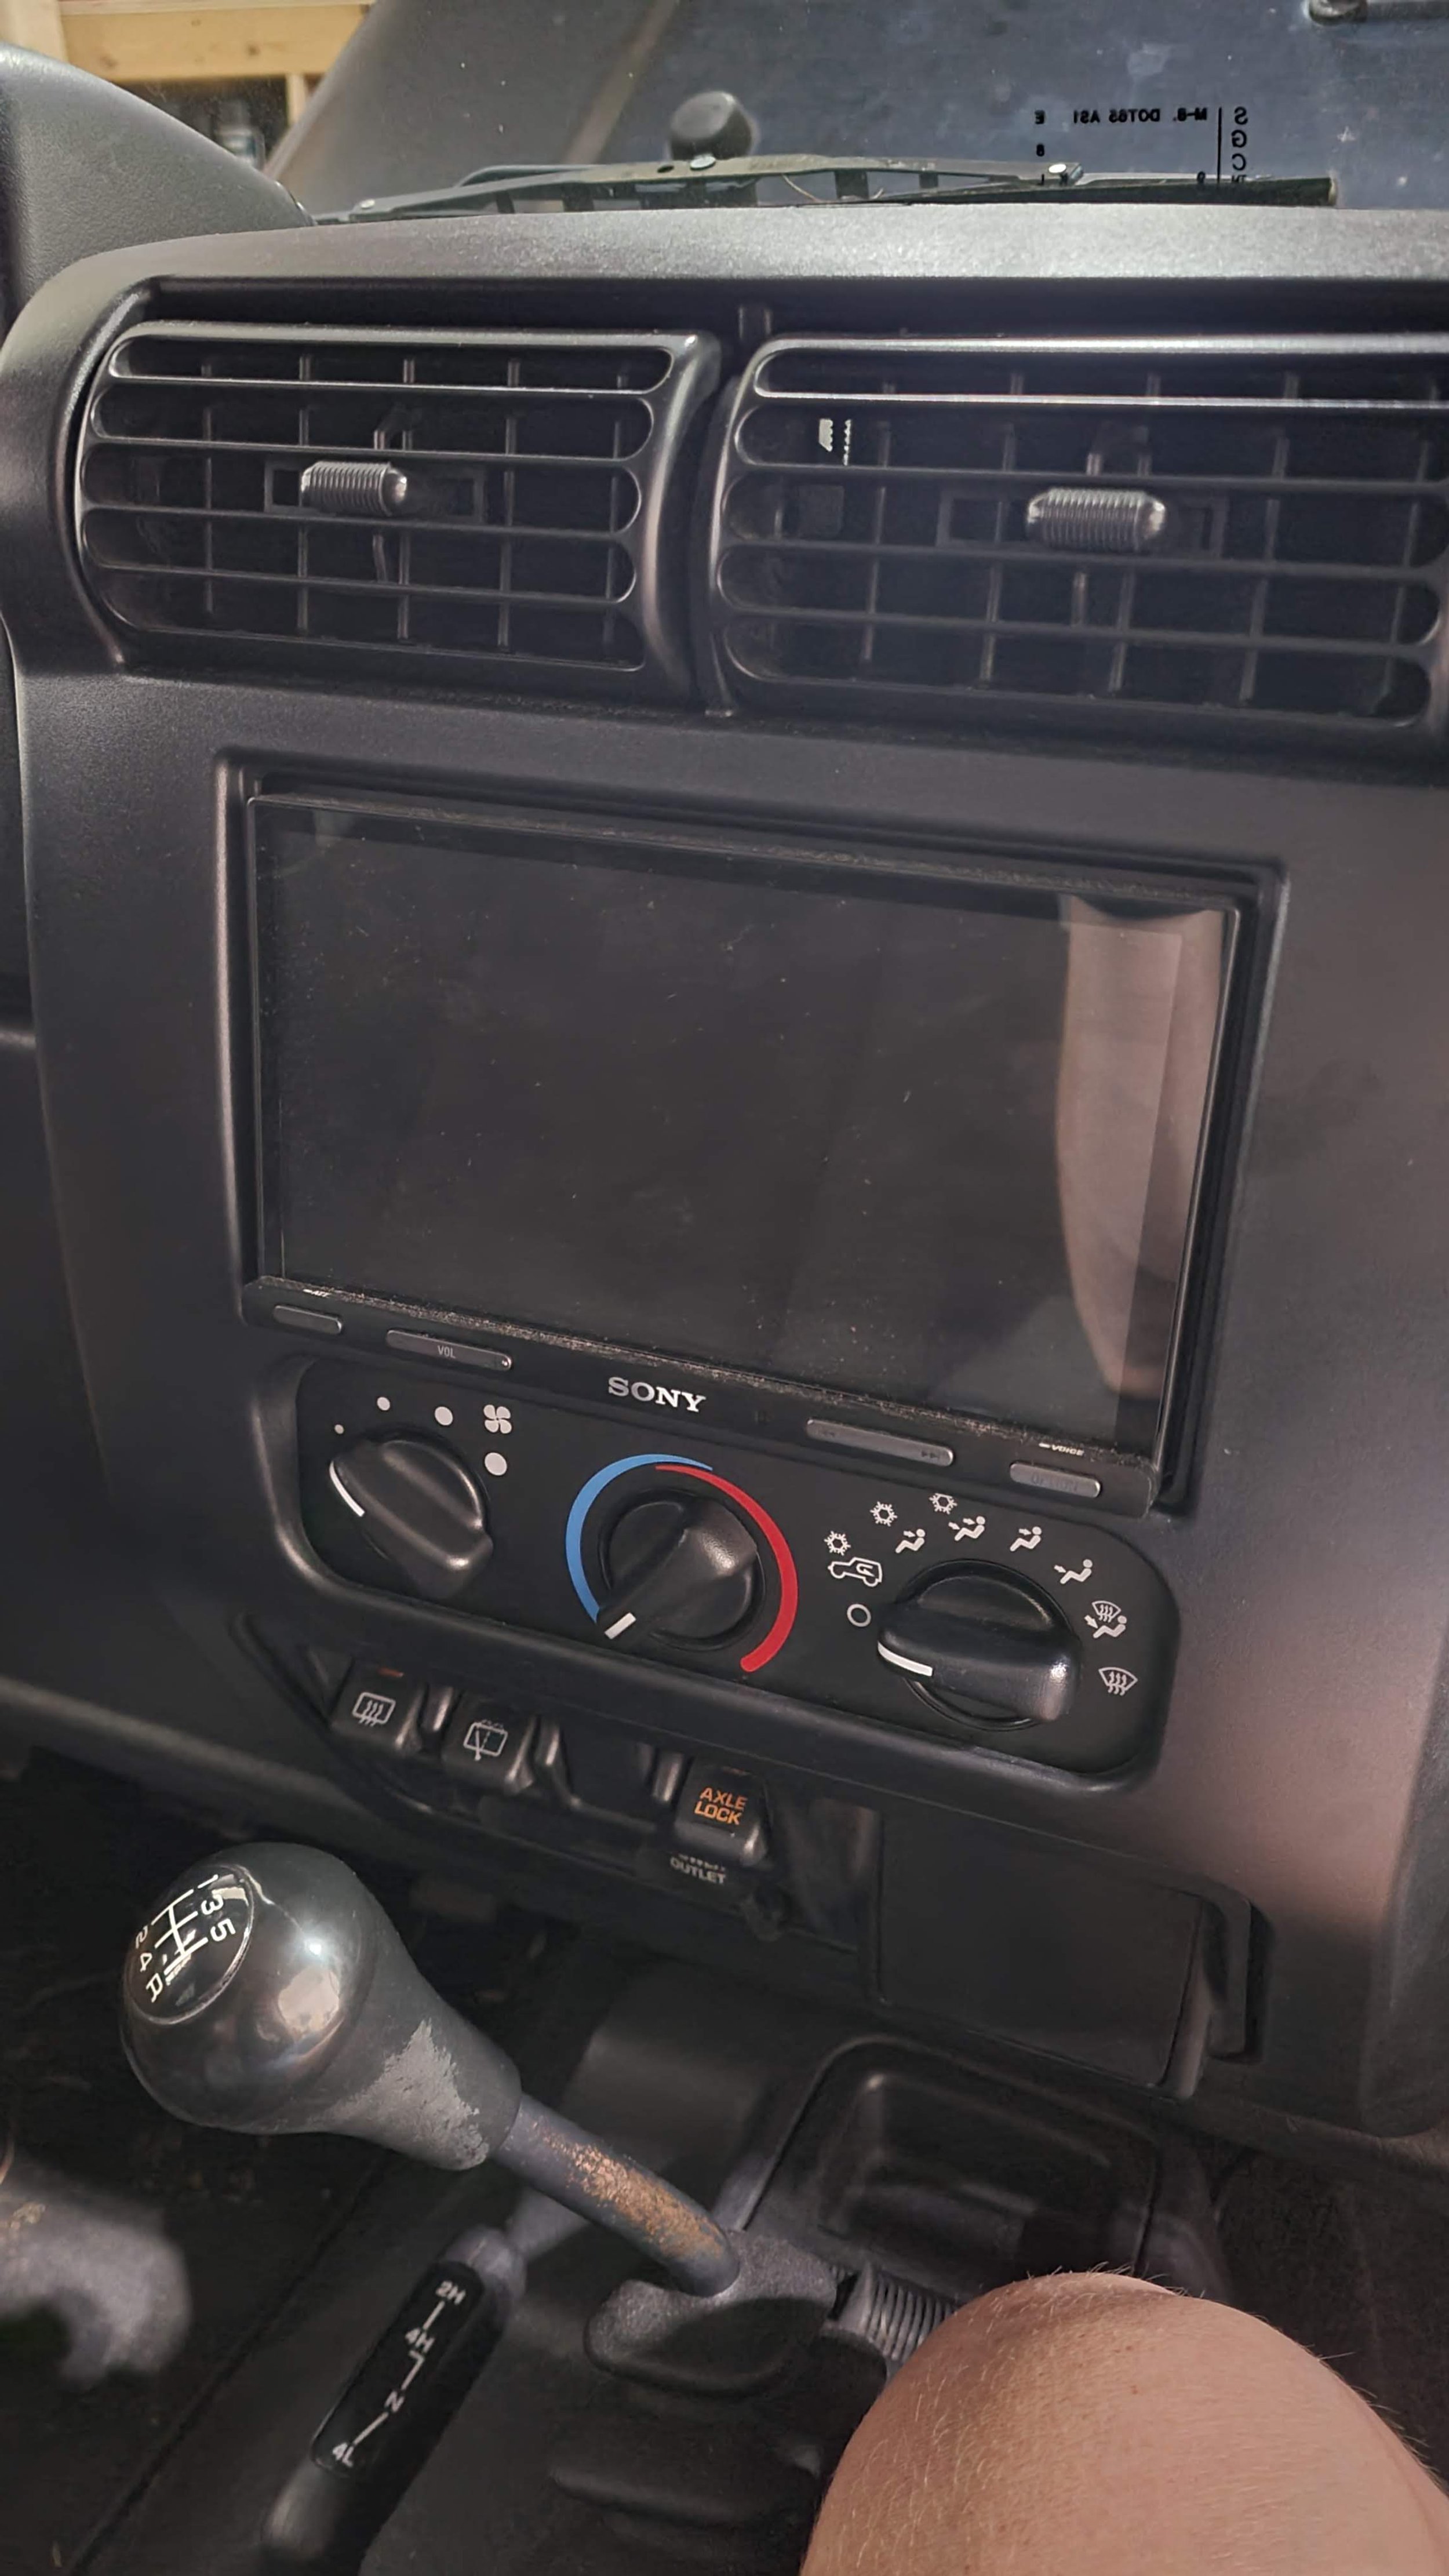
About 2 years ago I upgraded the stock stereo in my Jeep TJ and added a double din unit. The 6.95” screen and having android auto/carplay was a huge upgrade but the more I used it the more I realized I wanted something a little different. Due to the low location of the original stereo and the screen facing straight out, it wasn’t all that practical to look at it while driving, and it was a little small for how far away from my eyeline it was. So I set out to custom install a larger floating display into my Jeep.
Resources:
Double Din Jeep TJ Install Video
Disclaimer: The following post contains affiliate links. If you purchase a product through one of the links, I may receive a small commission (at no cost to you) that I can use to feed the platypus. And it’s always hungry.
For car audio, I recommend using Crutchfield.com (not sponsored FYI, just really like them). They're who I've used for every car audio install I've done as they make it really easy to get all the parts you need for your specific vehicle.
Get $20 when you create a Crutchfield account using the referral link here.
Head Unit
ABS Sheet
Speaker Gasket
All Purpose Cement
Plastic Shims
(in order of first use in the project)
Ratcheting Screwdriver
Band Saw (Old Craftsman Model)
Tap Set
The rest of this installation assumes you already have a double din head unit installed. If you need to know how to do that, check out my video here. Below is a picture of my old double din head unit.
The first thing I did was pick out a head unit, from my measurements I found that there was about 10 inches wide by 5.25 inches tall of available space above the ac controls and below the air vents, so I figured a display with an overall size around or less than that would work fine. All of the 10 inch displays I looked at were a bit too large so in the end I choose the 9” Pioneer DMH-WT3800NEX which has a screen measuring 9.215" x 5.36".
As this is a single din unit you might be wondering if you could just install this in the stock TJ radio slot. Unfortunately, that slot used a metal sleeve mounting system and that is not recommended for floating screen head units like this one as the weight of the screen sticking out from the dash would not be adequately supported. Best case, you’d have some annoying rattling, and worst case it could fall out of the dash entirely while driving.
The first thing I did was remove the old head unit from the mounting brackets that were apart of the metra double din dash kit and mount them to the new head unit.
I then test fit it in the double din slot. It fits pretty well but there are gaps between the head unit and the dash panel and the obvious wide open second din slot.
I filled the gaps around the head unit by adding some speaker gasketing tape around the top and sides. This gasket tape is great for filling gaps like this and giving a finished look.
To fill the slot below the head unit I cut a strip of ABS from a sheet. Since this was a custom install and there were no installation materials included, Crutchfield was nice enough to give me 2 sheets of ABS for free when I asked. Though, I couldn’t do this online and had to call the order in for them to do this.
At first I tried bending the ABS to fit, which was a fun process to learn and potentially useful in future projects but…
It wasn’t exactly useful here as the radius of the bends left gaps at the edges. I probably should have seen that issue ahead of time...
So instead I cut out three pieces and then used all purpose cement I already had from some plumbing work to fuse the pieces together.
After I left it overnight to cure, I clamped it to the mounting brackets, marked the holes with a metallic sharpie, and drilled them out.
I then tapped them the same size as the screws that came with the head unit (M5 x 0.8). You could just drill holes and bolt the piece in place but I already had the tap, so why not?
Once mounted, it’s starting to look like a finished product!
At this point the head unit was ready for installation so I connected all the wiring. If you need help with wiring, I covered the process in the double din install video I linked earlier.
The new head unit came with a gps antenna that lets it position itself and save battery drain of your phone as a result of using your phones gps. The gps receiver needs to be installed as close to the top of the dash and as level as possible. I found the top of the ac vents to be a good place but it’s not very level there so I added some plastic toilet shims with double sided tape to help a little before mounting the antenna.
With all the wires run it was time to hook up the monitor to test things out, and it works great!*
*Except… the mic didn’t work. I was really confused as to why and after pulling the unit out I learned that I had plugged the old 3.5mm mic jack into the wired steering wheel remote input as that was the only 3.5mm input on the back of the unit. I discovered that the new head unit used a 2.5mm input and that my old mic wouldn’t work without an adapter. Talk about annoying! Rather than putting off the project until I could get an adapter, I removed the old mic and installed the new one. It was a bit of the pain but it was a lot easier than when I installed the original mic as I learned that I could loosen the trim at the edge of the windshield by opening the door and loosening the three screws that hold it on.
Once that was sorted I test fit the dash panel and not surprisingly there were some small gaps.
A bit of speaker gasket on the back of the dash panel and we’re good to go!
With the screen installed, this is hardly visible and probably doesn’t matter at all… but I would know it’s there so I had to fix the gap. There’s a lot of space behind the custom panel and I while I don’t intend to do anything with it for now, it could for example be a good place to discretely mount amp controls if I end up installing an amp in the dash.
The dash panel is installed now and it’s time to mount the screen. I added the bracket (without the spacer!) and placed the screen on the bracket at it's lowest mounting position as the head unit is mounted pretty high relative to the center of the opening between the ac vents and the ac controls.
At this point I added the screen and attempted to install the shroud that covers the screen bracket but it wouldn’t push down into position. After some investigating I learned that there’s a plastic piece that interferes with the wires to the screen when it’s mounted in its lowest position. It wouldn’t have been a problem if the screen were mounted at any of the higher positions.
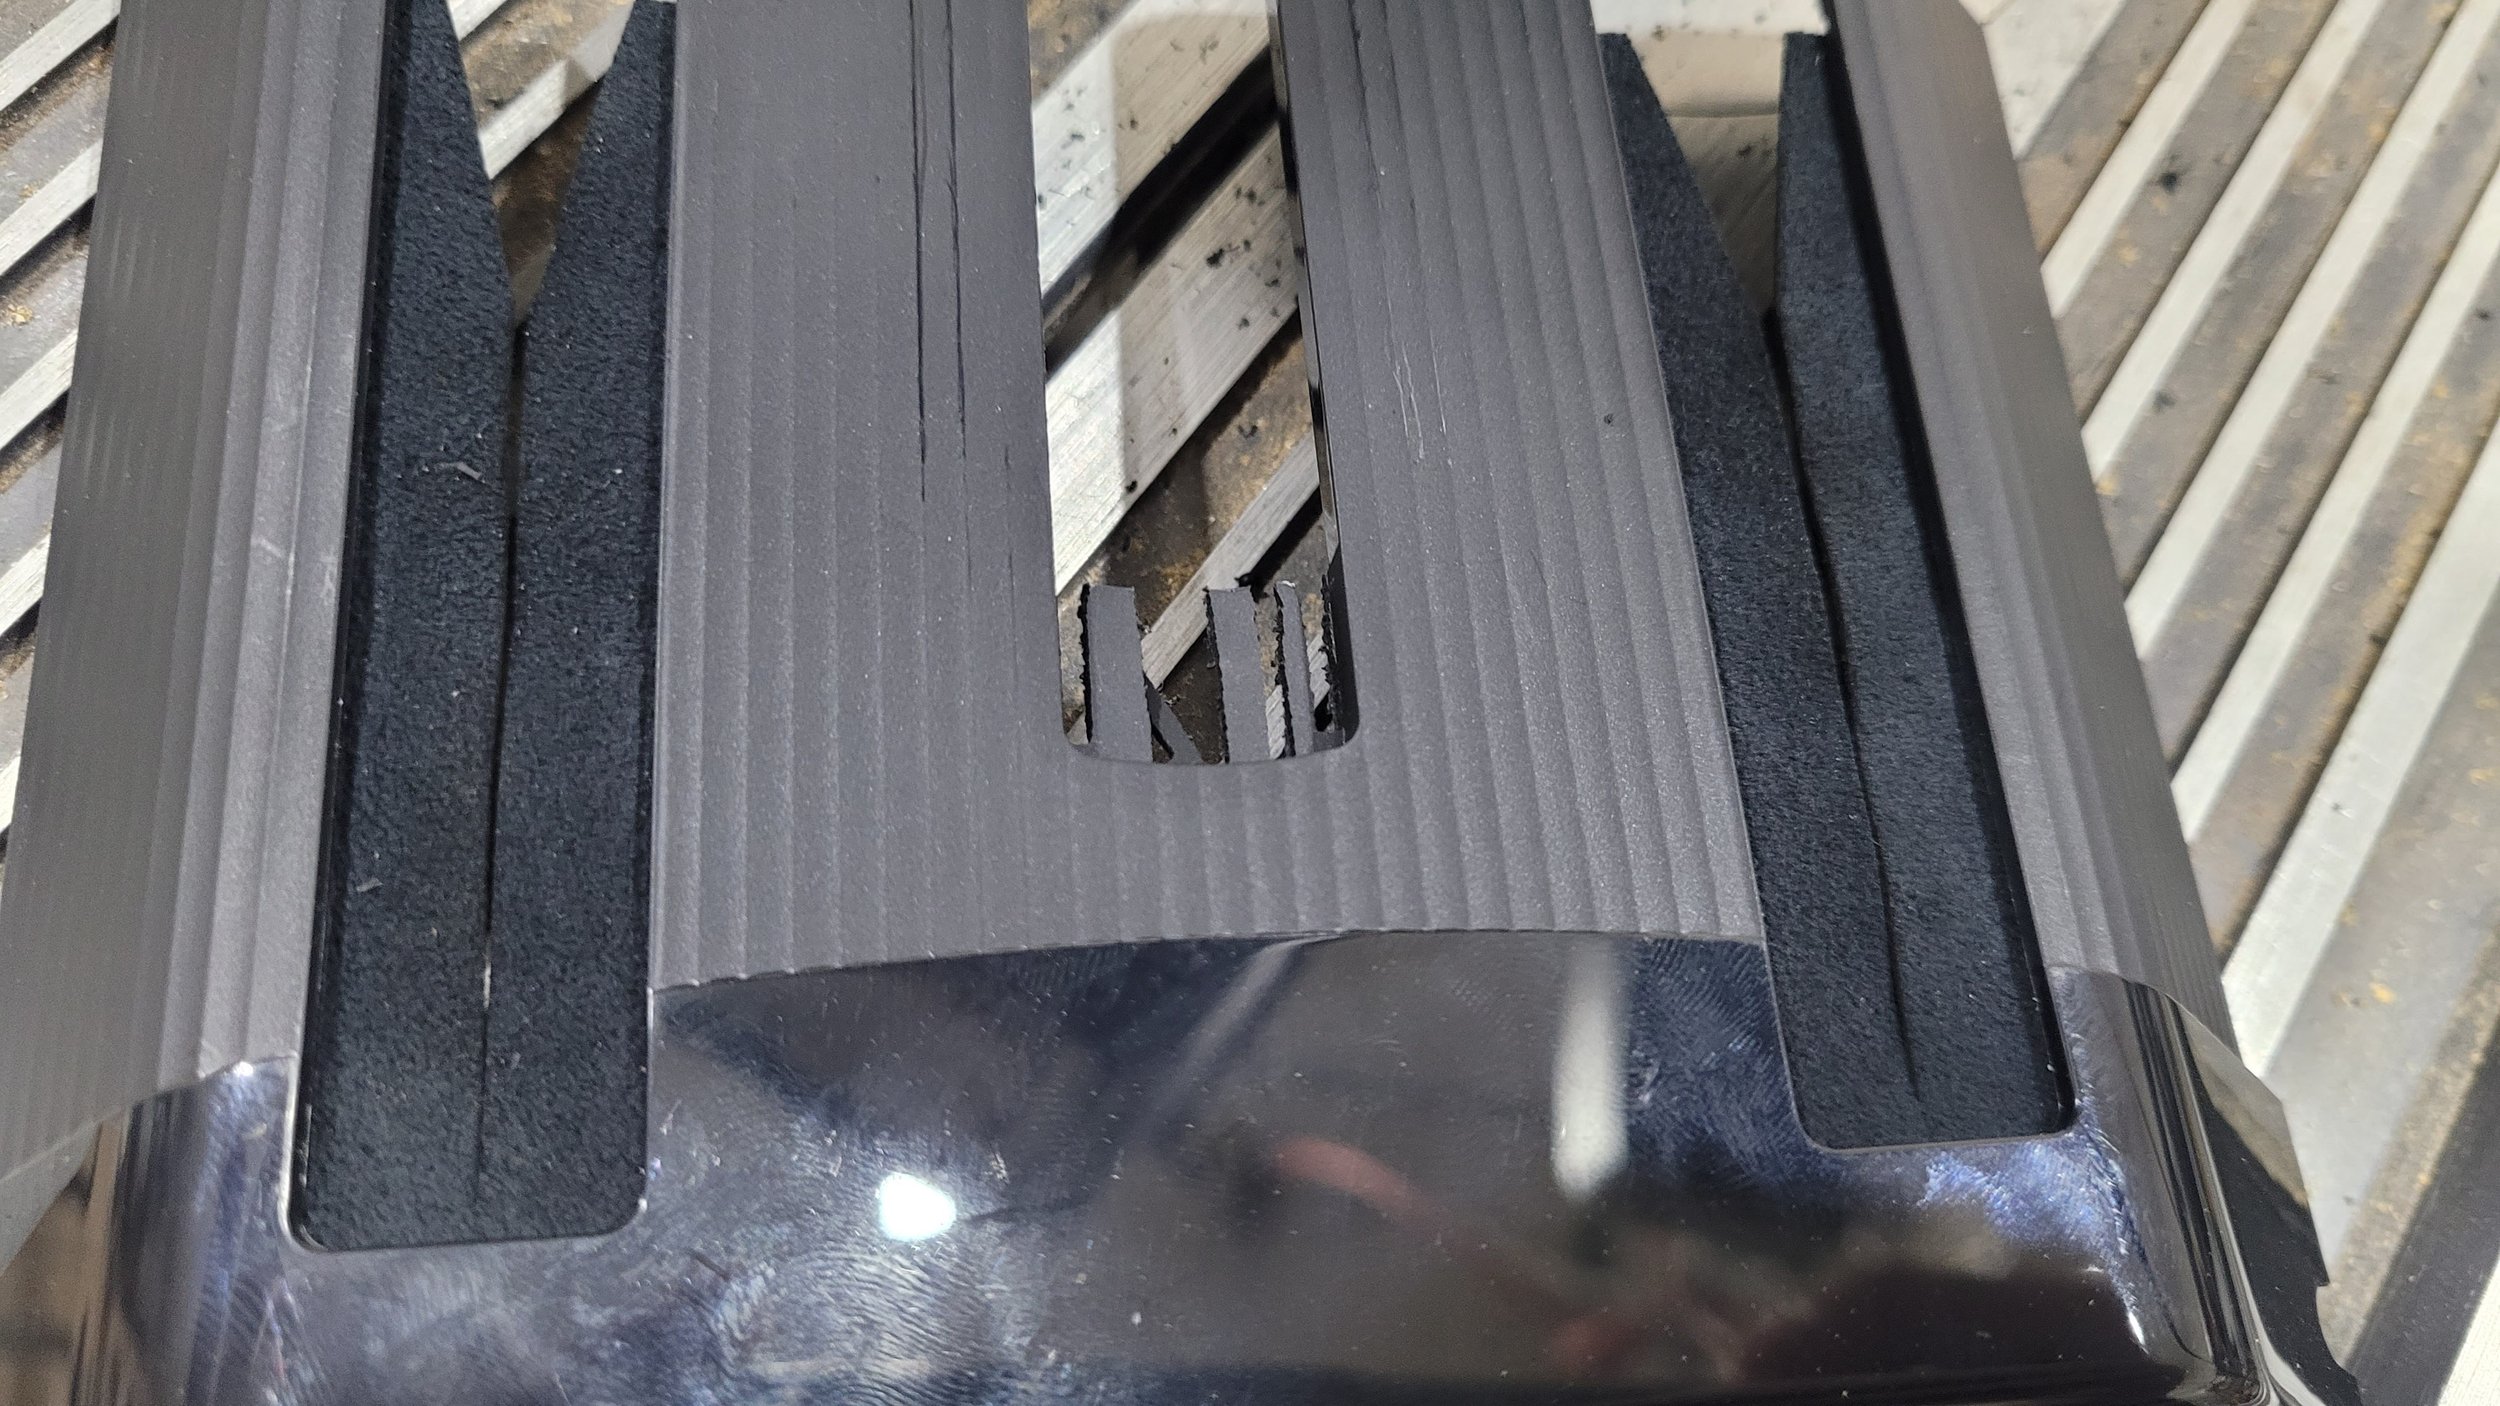
This really seems like a design oversight to me. I removed that bit of plastic using my band saw and some sandpaper.
Afterwards it fits as it was supposed to. There is not a lot of clearance between the dash and the screen and I found it best to tilt the screen forwards to start putting the shroud on, and slowly tilt the screen back as the shroud moved down.
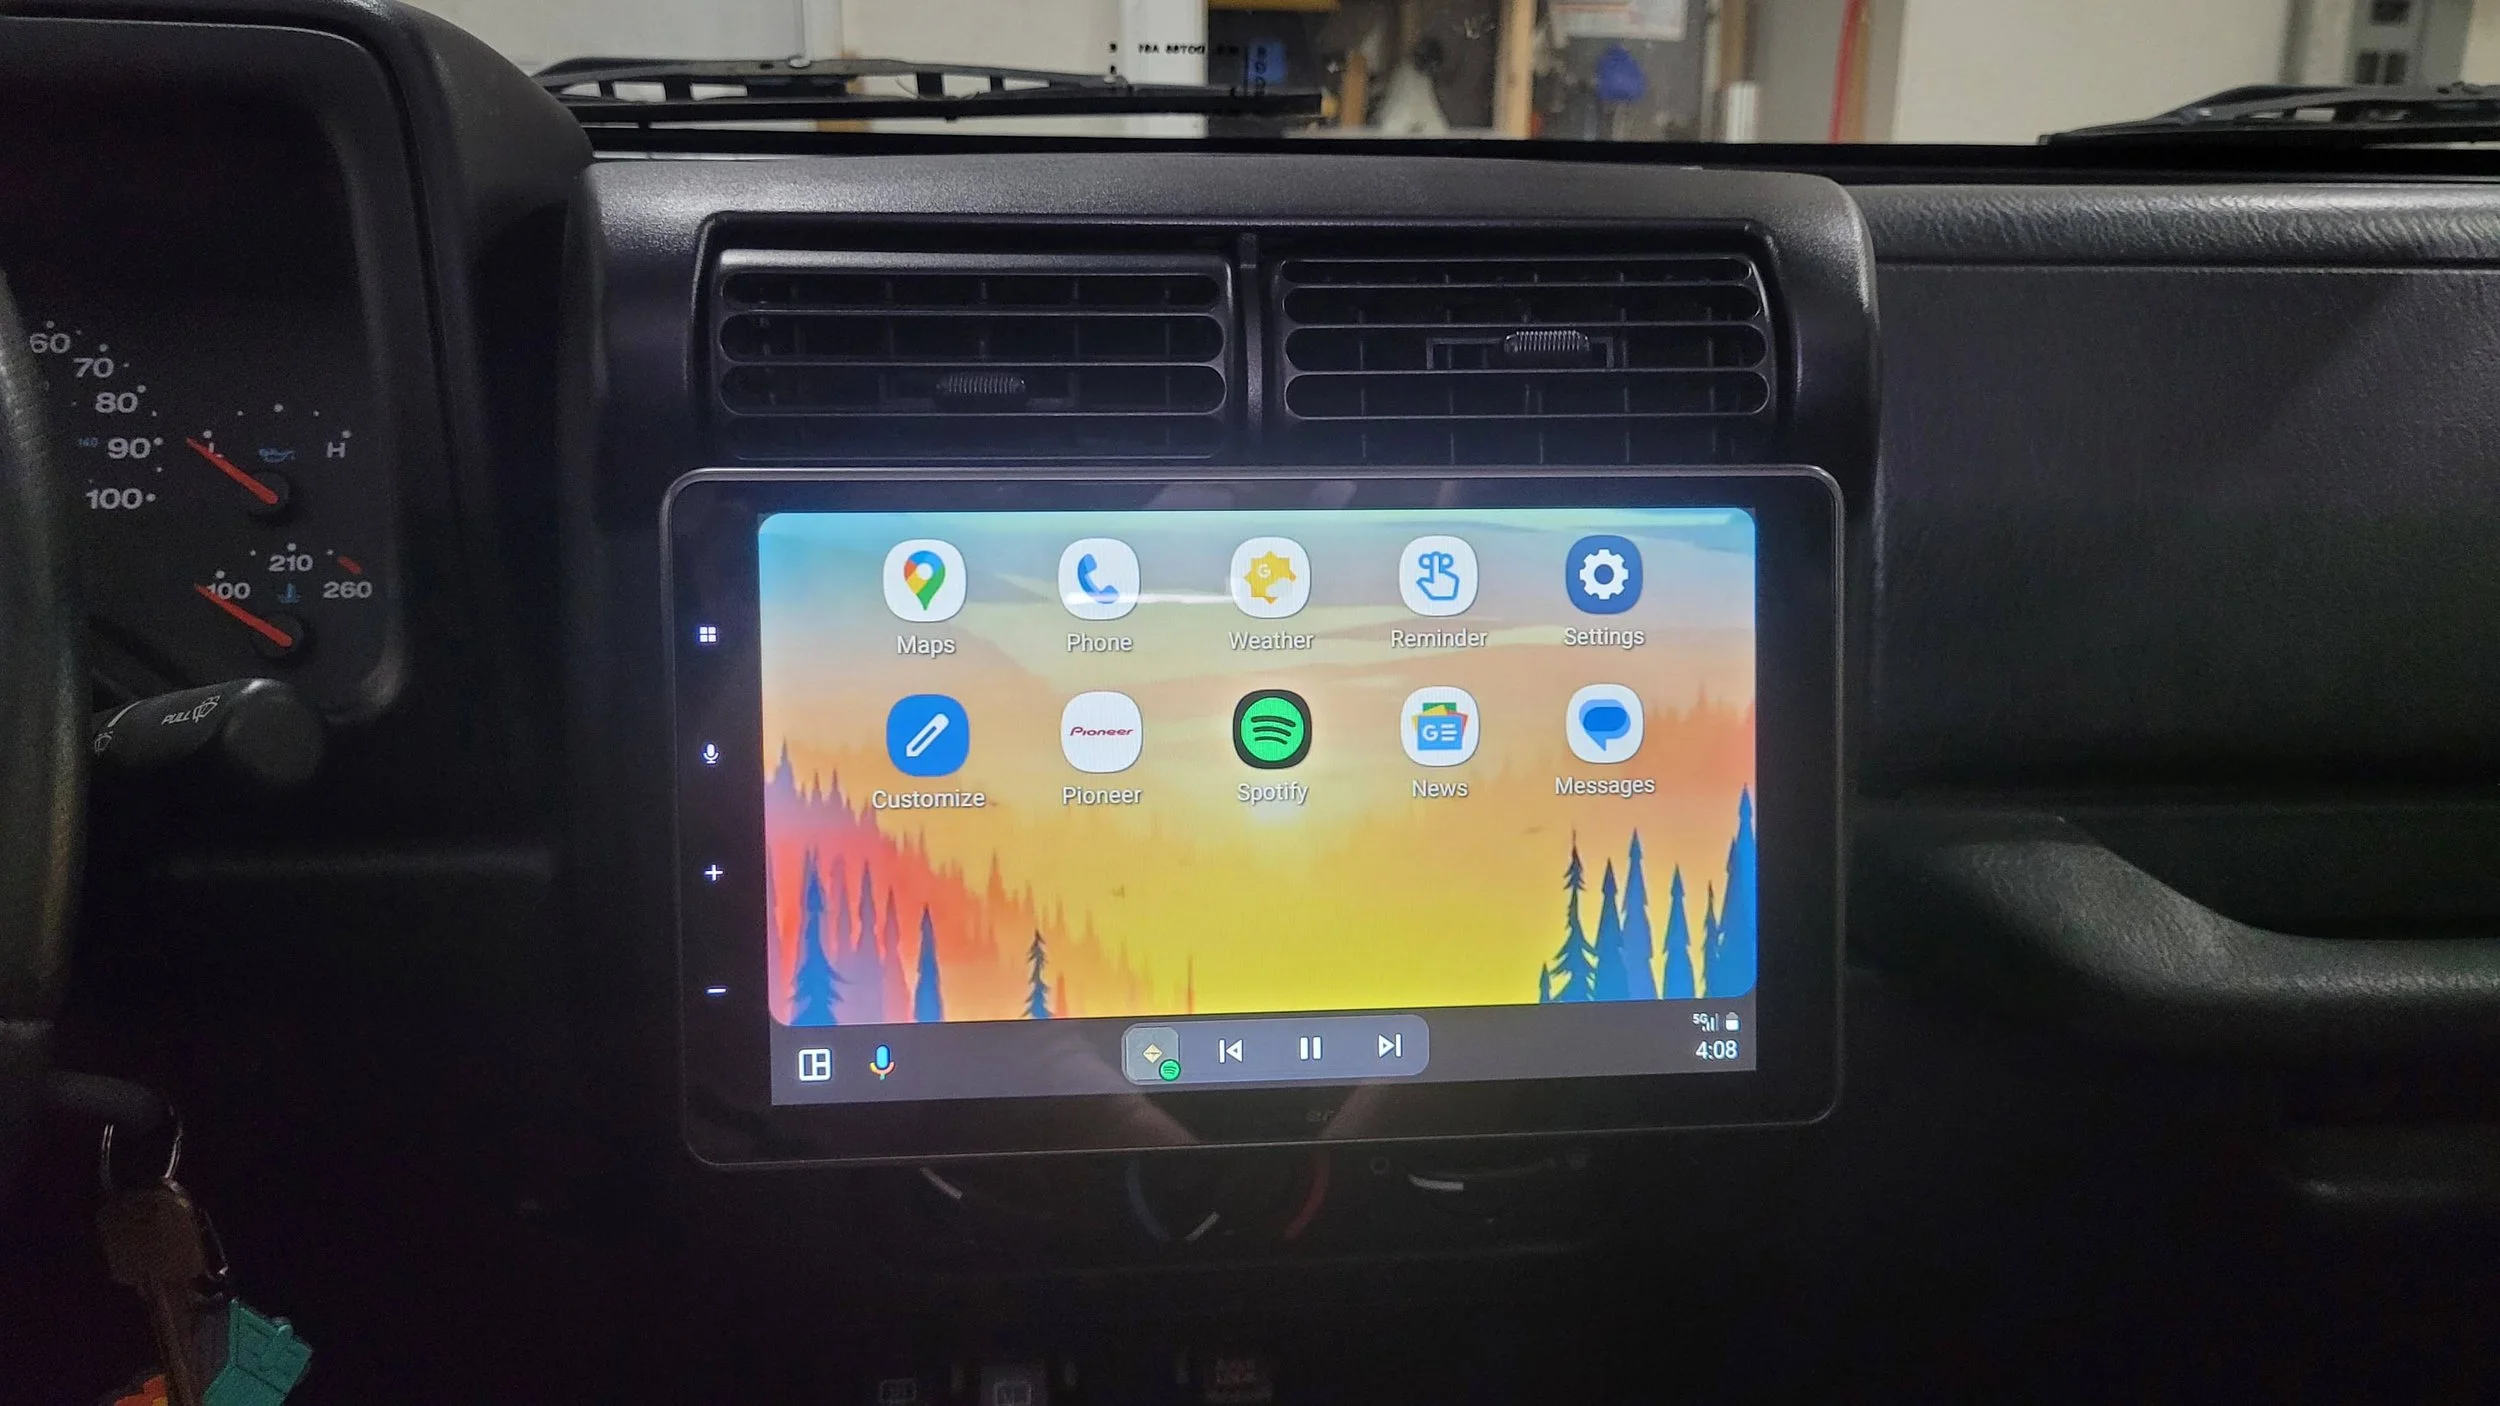
And we’re done! I’ve put some pictures below of the finished look. It doesn’t block the vents or interfere with the shifter and while I can’t see the labels on the ac controls from my driving position, I pretty much have them memorized so it doesn’t really matter at all. I’m super happy with it! It makes the TJ feel somewhat modern which I didn’t really think was possible before.
However, I will say that I do miss the physical buttons on my old radio. I’m going to have to source one of the WJ steering wheels with the steering wheel controls on the back fairly soon and figure out how to get that working with the head unit. Sounds like a really interesting project!
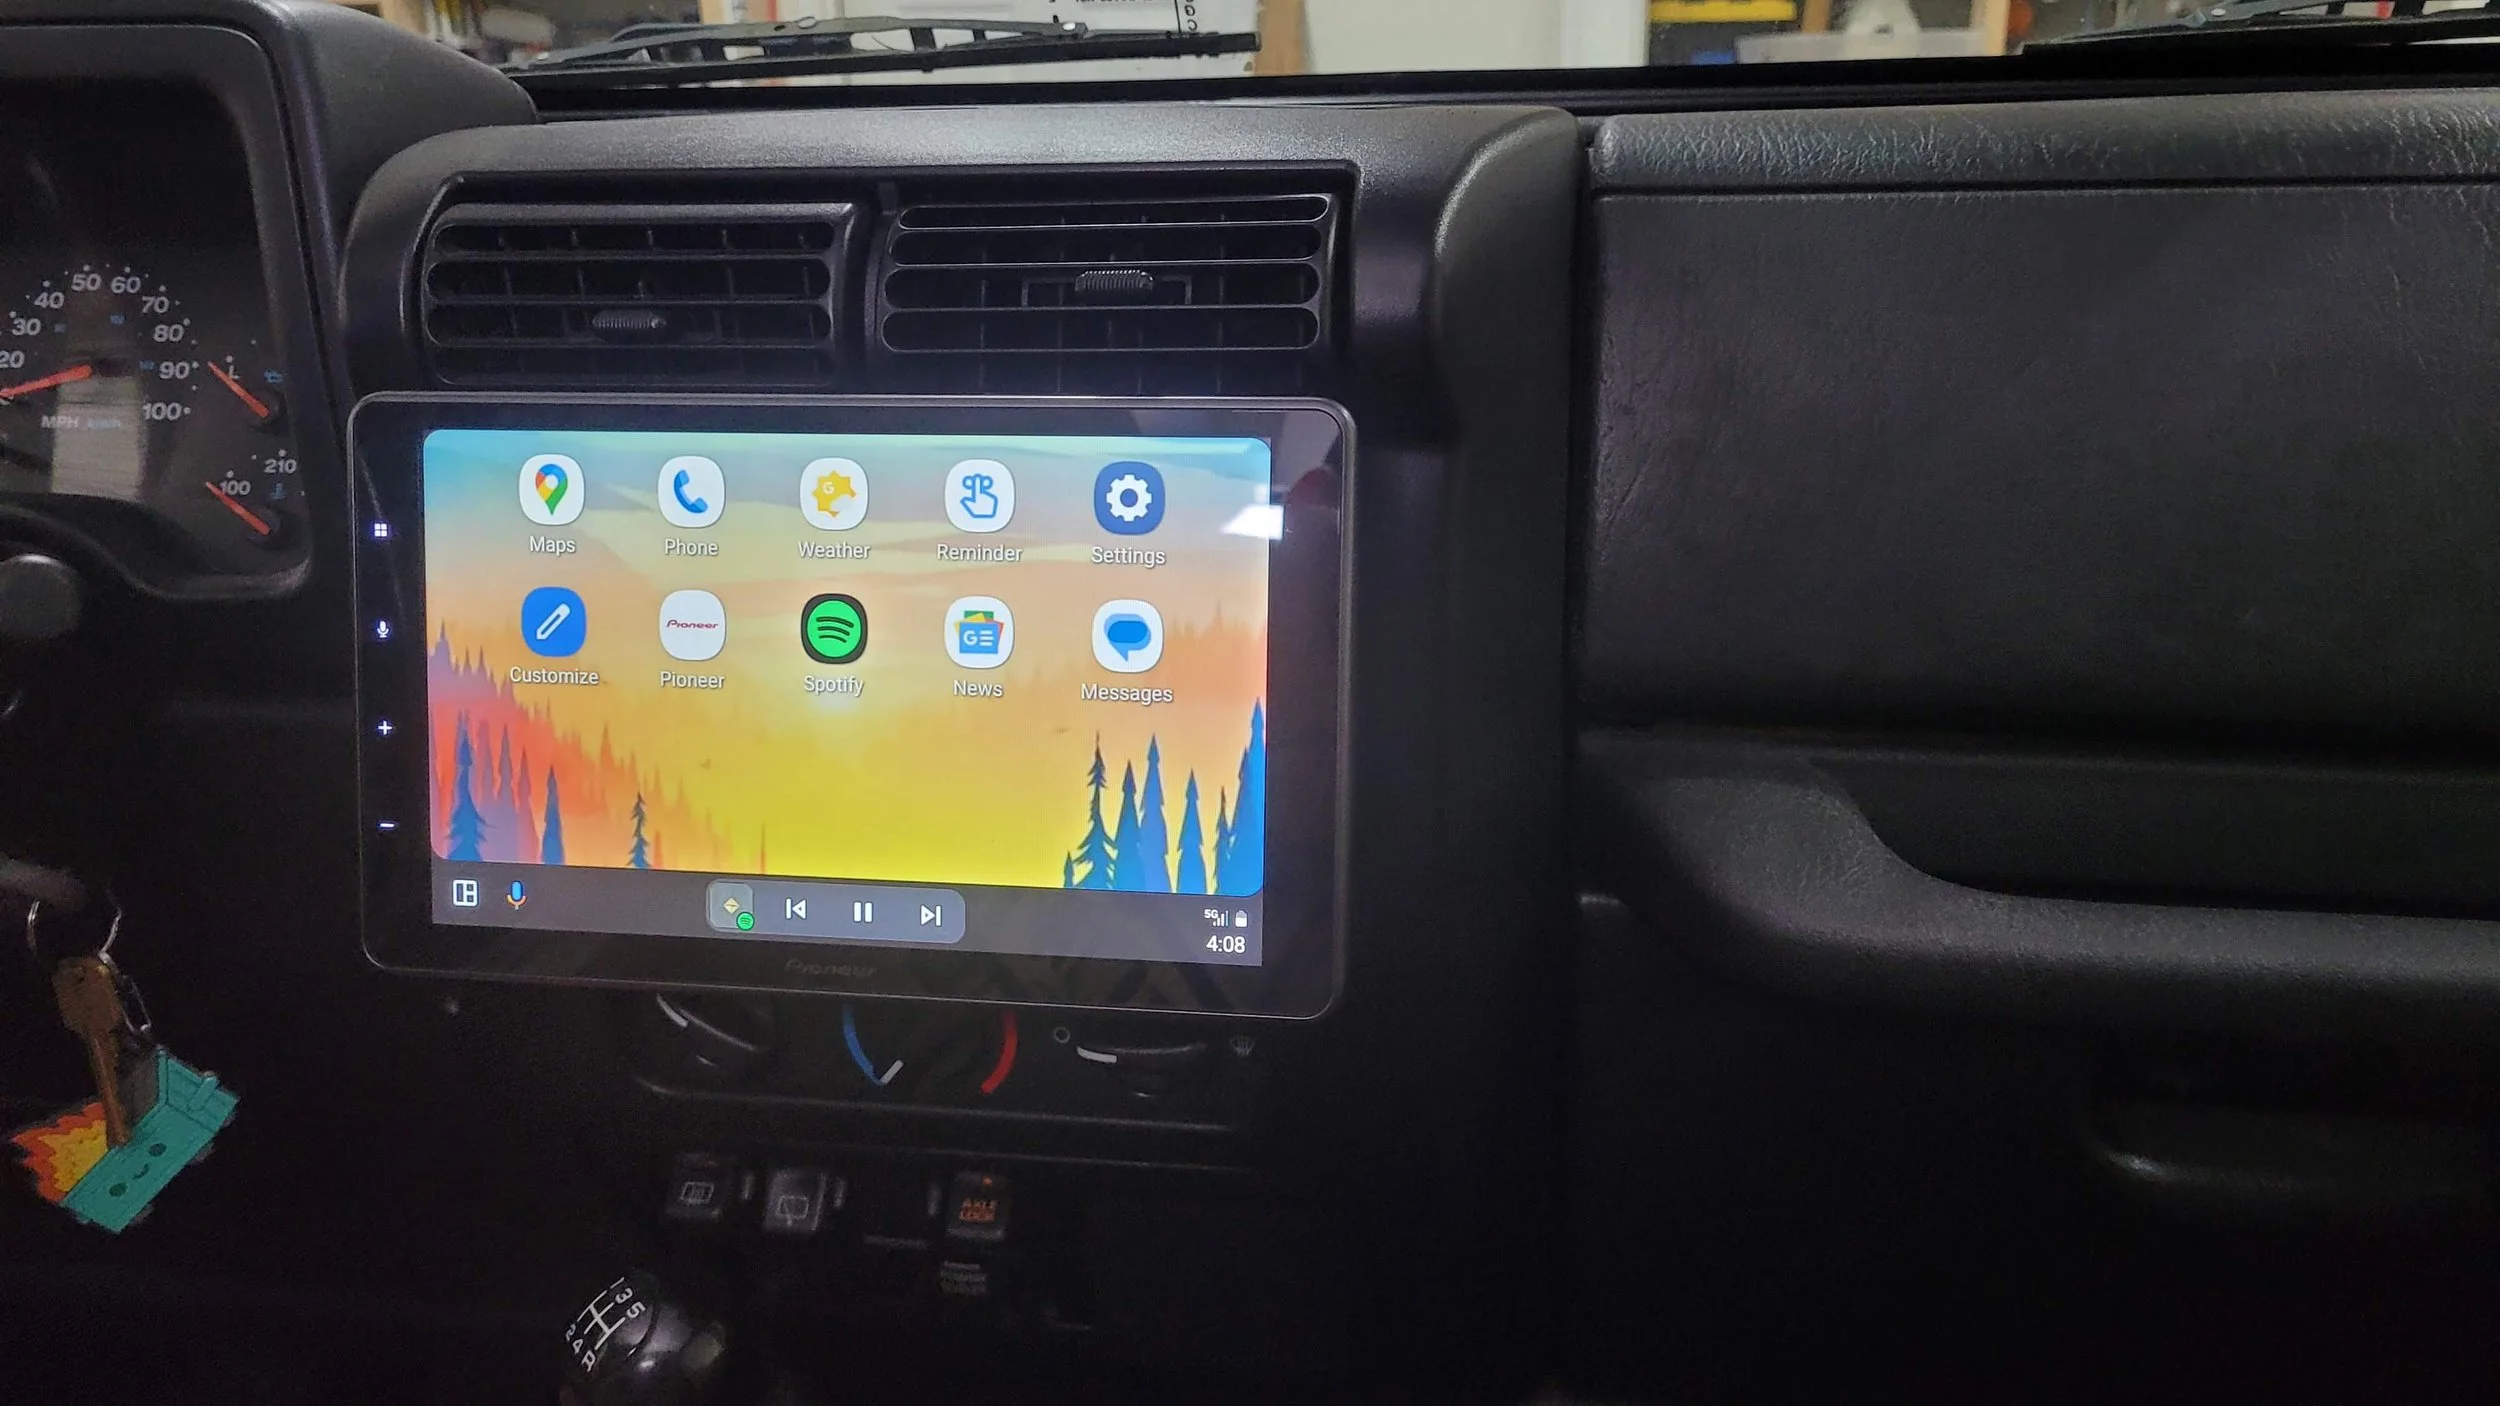

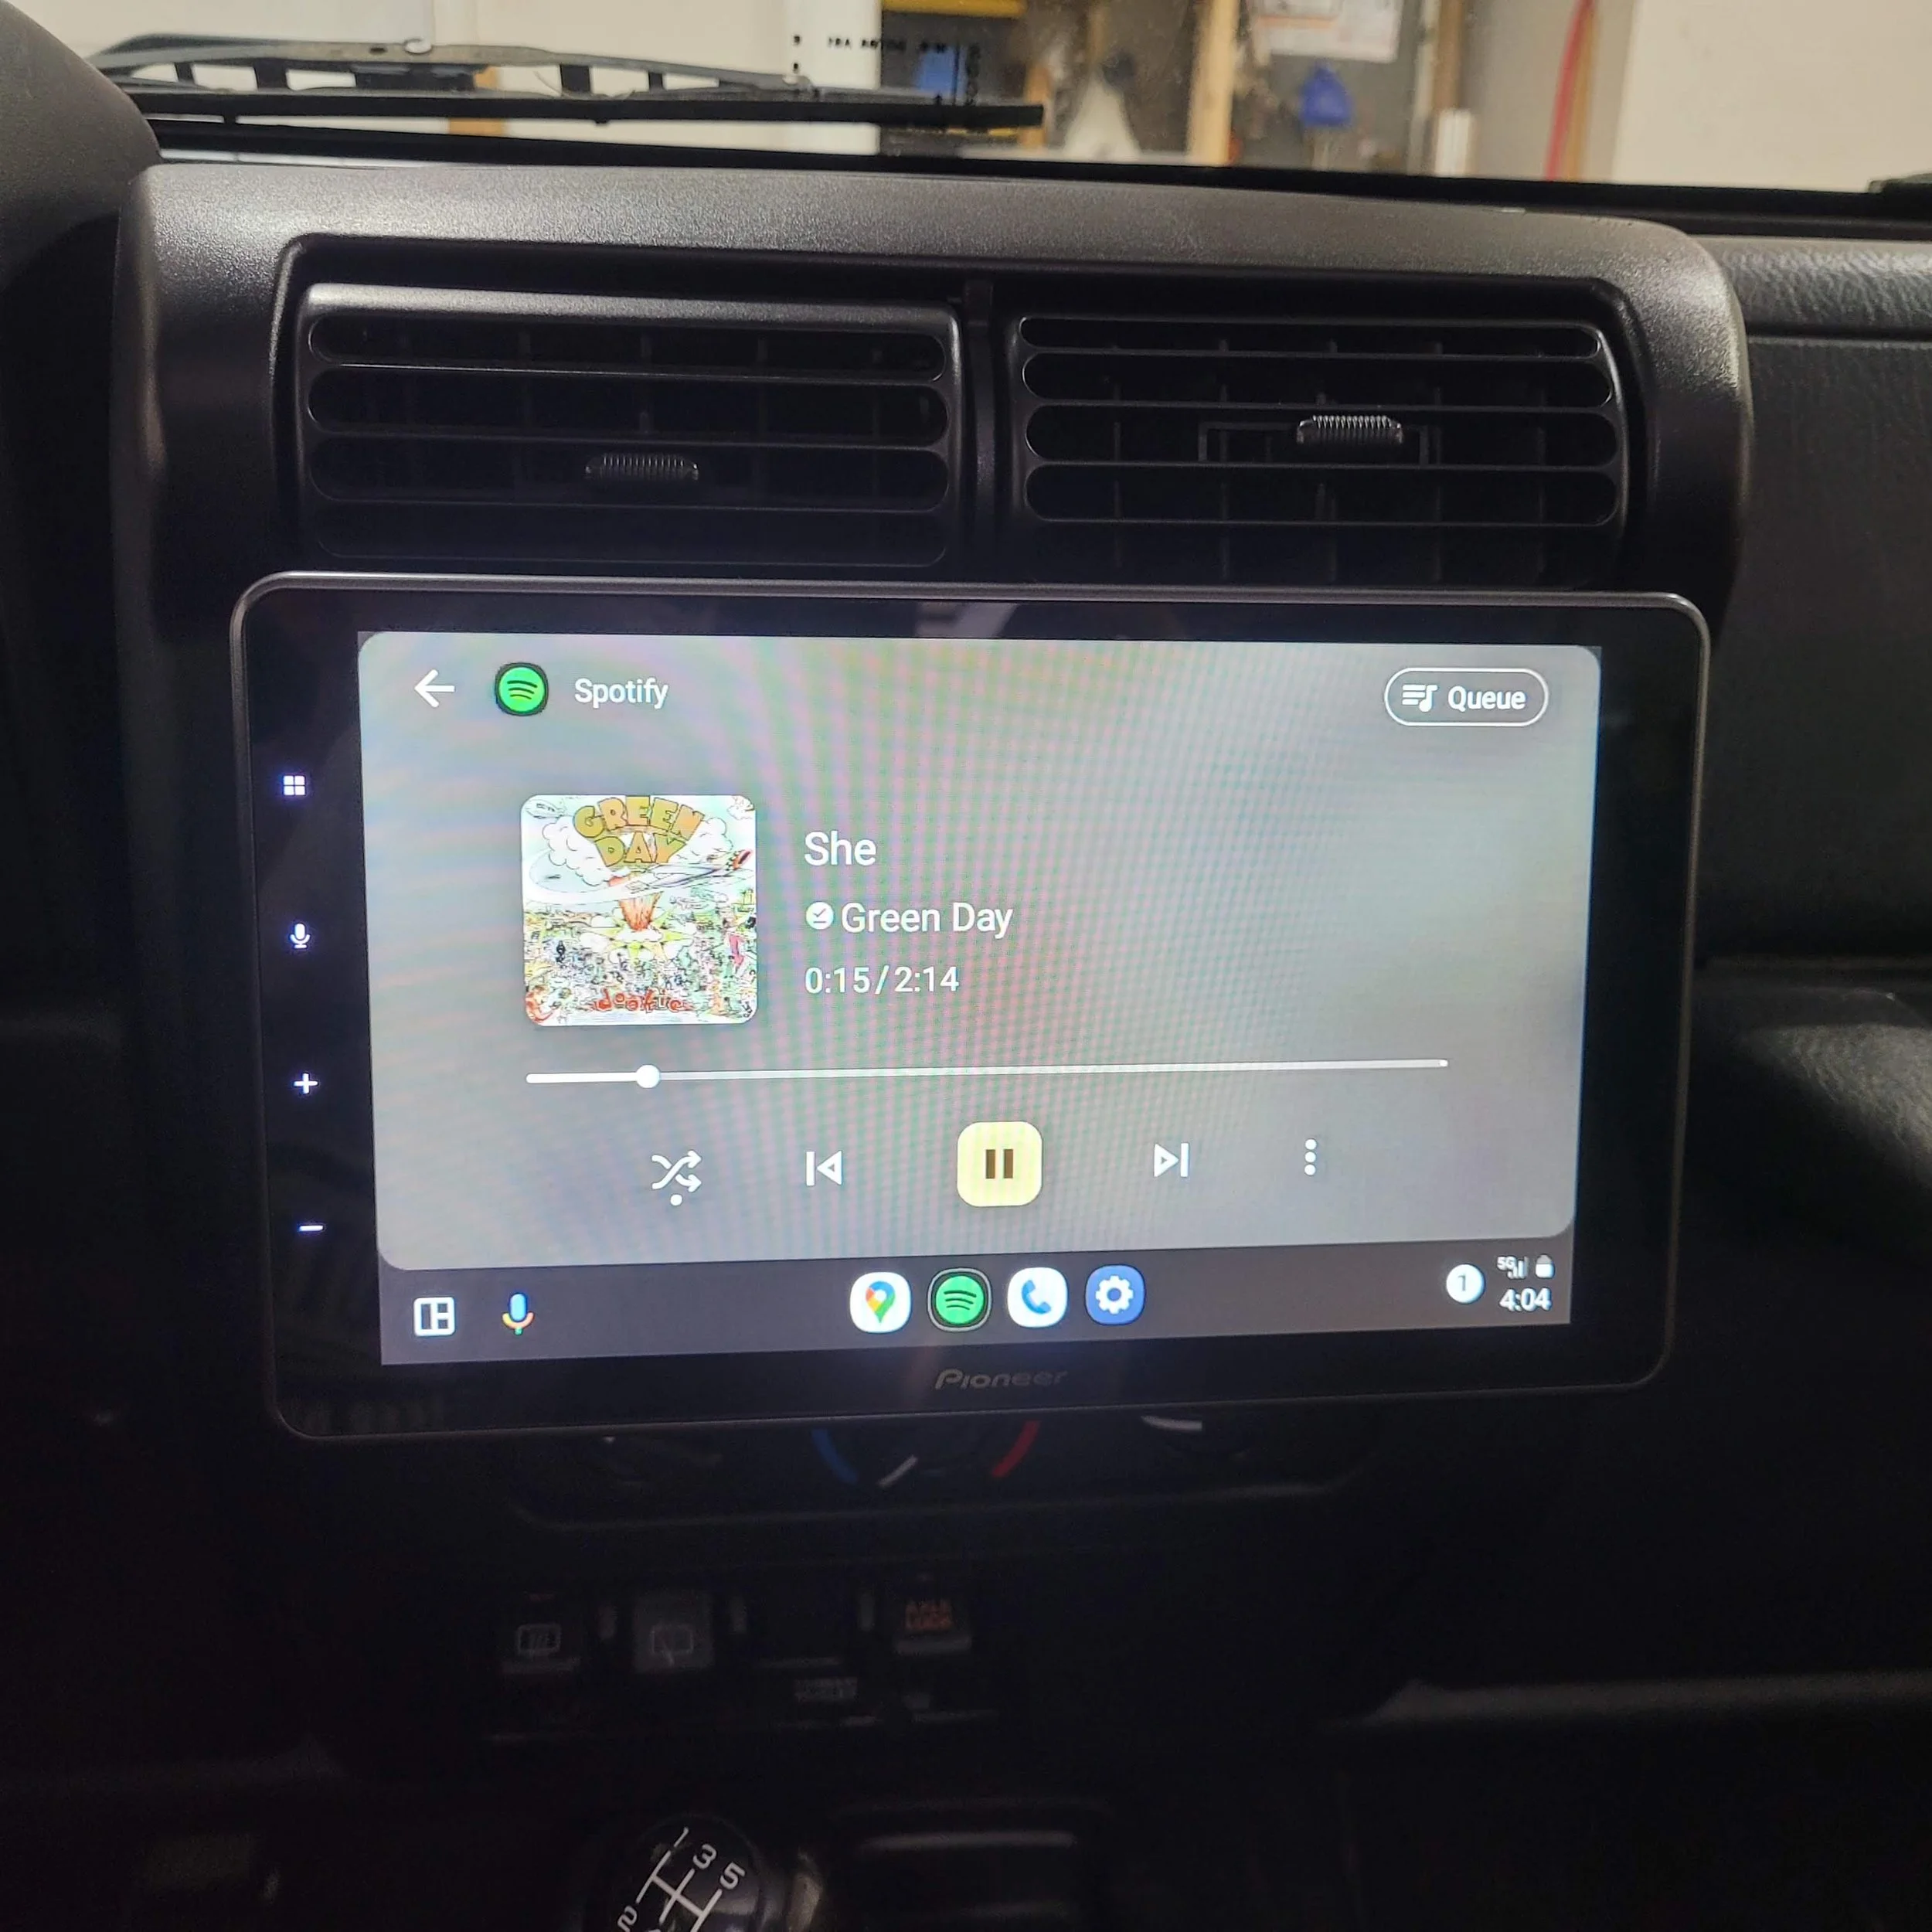
I'd love to hear any questions or thoughts about installing the floating head unit that you might have so be sure to let me know in the comments.
If you're not already subscribed to Project Billd content you can do that here and if you want to see more projects like this one be sure to check out my other projects on this site!
Until next time, Go Billd Yourself!
Don’t miss a thing!
Subscribe to get the latest content
How to Renovate a Fireplace Surround
Completely renovating a fireplace surround. Installing a hearth, tile/stone, and fireplace surround with shiplap above. Learn how you can make and install a new shaker style fireplace surround.
I've been working on the fireplace surround for a while now (having a kid will really slow things down!) and it's finally complete. The renovated fireplace is a beautiful addition to Brady's office.
Resources:
FREE Supplemental 3D Project Diagrams
Disclaimer: The following post contains affiliate links. If you purchase a product through one of the links, I may receive a small commission (at no cost to you) that I can use to feed the platypus. And it’s always hungry.
(most materials available at your local home improvement store)
1/2" Drywall and Screws (coarse and fine thread)
Adhesive Joint Tape
All Purpose Joint Compound
Primer
Semi-Gloss Alkyd Paint (White)
Pavers for Hearth
Ledgestone Tile
Cement Backerboard
Porcelain Tile Mortar
Spiral Mixing Arm
Tile Trowel
Cement Board Screws (1 1/4")
1/8" Tile Spacers
Cabinet Screws (2 3/4")
High Temp Sealant
Wood Shims
3/4" Plywood
Pocket Hole Screws (1 1/4" Coarse Thread)
1/4" MDF Sheet
Wood Glue
Wood Filler
Screws (2 1/2")
Trim Screws (1 1/4")
Caulk
Spackling
Light Gray Caulk
Primed Pine Boards (1x4, 1x6)
Shiplap
(in order of appearance in the video)
Utility Knife
Molding Tool
Prybar
Scraper
Oscillating Multitool
Impact Driver
Portable Drill
Drywall Knife (6in)
Measuring Tape
Drywall Square
Wet Tile Saw
Levels
Brad Nailer
Caulk Gun
Clamping Straight Edge
Circular Saw
Table Saw
Table Saw Push Blocks
Miter Saw
Pocket Hole Jig
Clamps
Right Angle Drill Adapter
Short Pocket Hole Bit
Brayer Roller
Pin Nailer
Putty Knife
Random Orbital Sander
Centerpunch
Laser Level
If you liked the video be sure to give it a thumbs up on YouTube and I'd love to hear any questions or thoughts about making and installing the fireplace surround that you might have so be sure to let me know in the comments section!
If you're not already a subscriber consider subscribing and if you want to see more projects like this one be sure to check out my other projects on this site!
Until next time, Go Billd Yourself!
Don’t miss a thing!
Subscribe to get the latest content
How to Update an Old Gas Fireplace
Gas Fireplace Restoration and Update. Learn how to update your old gas fireplace to improve its appearance and significantly improve the ambiance of your space, all while retaining your existing gas logs!
Disclaimer: The following post contains affiliate links. If you purchase a product through one of the links, I may receive a small commission (at no cost to you) that I can use to feed the platypus. And it’s always hungry.
(most materials available at your local home improvement store)
High Temp Paint
High Temp Sealant
Yellow PTFE Tape
Flexible Gas Line
Silica Sand (for Natural Gas Logs)
Vermiculite (for Propane Logs)
Rock Wool
Platinum Embers
Lava Rocks
Aftermarket Glass Fireplace Doors (varies by fireplace model)
(in order of appearance in the video)
If you liked the video be sure to give it a thumbs up on YouTube and I'd love to hear any questions or thoughts about updating the fireplace that you might have so be sure to let me know in the comments section!
If you're not already a subscriber consider subscribing and if you want to see more projects like this one be sure to check out my other projects on this site!
Until next time, Go Billd Yourself!
Don’t miss a thing!
Subscribe to get the latest content
How to Make a Wood Beam Mantel
Learn how to make a hollow beam fireplace mantel from wood boards!
Brady's office update is coming along and in the midst of the fireplace surround remodel I needed a mantel to finish things off. I love the look of wood beam mantels but the ones I found for sale were the wrong dimensions, expensive, and just didn't have the look I wanted so I made my own.
If you'd like to make one for yourself, enjoy the video tutorial and be sure to check out the FREE supplemental 3D diagrams below:
Resources:
Disclaimer: The following post contains affiliate links. If you purchase a product through one of the links, I may receive a small commission (at no cost to you) that I can use to feed the platypus. And it’s always hungry.
(most materials available at your local home improvement store)
Oak Hardwood (mine came from local hardwood store)
Wood Glue
Pocket Hole Screws (1 1/4" Fine Thread)
Trim Screws (1 1/4", 2 1/2")
Washer Head/Cabinet Screws (1 1/4", 2 3/4")
Wood Screws (1 1/4")
5" Sanding Discs (220 Grit)
Sand Paper (220, 320 grit)
Stain (Dark Walnut)
Walnut Wood Filler
Wipe-On Polyurethane (Satin)
(in order of appearance in the video)
Miter Saw
Table Saw
Table Saw Push Blocks
Magnetic Featherboard
Thickness Planer
Angle Gauge
Measuring Tape
Pocket Hole Jig
Portable Drill
Clamps
Speed Square
Impact Driver
Right Angle Drill Adapter
Brad Nailer
Wood Glue Brush
Countersink Drill Bit
Cats Paw
Prybar
Random Orbital Sander
If you liked the video be sure to give it a thumbs up on YouTube and I'd love to hear any questions or thoughts about making the beam mantel that you might have so be sure to let me know in the comments section!
If you're not already a subscriber consider subscribing and if you want to see more projects like this one be sure to check out my other projects on this site!
Until next time, Go Billd Yourself!
Don’t miss a thing!
Subscribe to get the latest content
How to Make and Install a Herringbone Ceiling
Learn how to turn your old boring ceiling into a new pretty ceiling by adding a herringbone pattern to improve its appearance and make all your friends go oooh and ahhhh!
Disclaimer: The following post contains affiliate links. If you purchase a product through one of the links, I may receive a small commission (at no cost to you) that I can use to feed the platypus. And it’s always hungry.
(most materials available at your local home improvement store)
1/4" Backer Plywood
1/4" Oak Plywood
Dark Walnut Stain
Wood Glue
Lambswool Stain Applicator
Satin Polyurethane
3/4" Oak Boards
Ceiling Box Extender
Ceiling Fan
(in order of appearance in the video)
Ratcheting Screwdriver
Non-Contact Voltage Tester
Measuring Tape
Drywall T-Square
Clamping Straight Edge
Circular Saw
Portable Drill
Jigsaw
Stud finder
Brad Nailer
Laser Level
Countersink Drill Bits
Impact Driver
Table Saw
Table Saw Push Blocks
Miter Saw
Chamfer Router Bit
Router
Random Orbital Sander
Sanding Discs (150, 220 Grit)
Pin Nailer
Nail Puller Pliers
Hand Sander
Band Saw
Thickness Planer
Angle Finder
Angle Gauge
Magnetic Featherboard
If you liked the video be sure to give it a thumbs up on YouTube and I'd love to hear any questions or thoughts about making and installing the herringbone ceiling that you might have so be sure to let me know in the comments section!
If you're not already a subscriber consider subscribing and if you want to see more projects like this one be sure to check out my other projects on this site!
Until next time, Go Billd Yourself!
Don’t miss a thing!
Subscribe to get the latest content
How to Install LED Under and Above Cabinet Lighting Hooked to a Wall Dimmer Switch
Learn how to add LED under and above cabinet lighting running from a smart dimmer switch to your kitchen to improve its appearance, provide task lighting for your counters, and significantly improve the ambiance of your space!
Resources:
Note: if you're not completely comfortable doing electrical work, then call an electrician!
3-Way Switches Explained
Outlet and Switch Basics
LED Strip Lighting Planning
Soldering LED Strip Lighting
LED Wattage Requirement Chart
12V Voltage Drop Calculator
Disclaimer: The following post contains affiliate links. If you purchase a product through one of the links, I may receive a small commission (at no cost to you) that I can use to feed the platypus. And it’s always hungry.
(most materials available at your local home improvement store)
Smart Dimmer Switch
Dimming LED Driver (12 Volt)
LED Strip Lights
LED Cable
LED Strip Light Track
Heat Shrink Tubing
Push in LED Strip Connectors (optional)
Old Work Electrical Box
Romex Cable
Push-In Wire Connectors
Washer Head Screws (1/2")
Cable Clamps
Joint Compound
If you liked the video be sure to give it a thumbs up on YouTube and I'd love to hear any questions or thoughts about installing the LED lighting that you might have so be sure to let me know in the comments section!
If you're not already a subscriber consider subscribing and if you want to see more projects like this one be sure to check out my other projects on this site!
Until next time, Go Billd Yourself!
Don’t miss a thing!
Subscribe to get the latest content
How to Make a Permanent Stirrup Step for a Jeep
I recently bought a 2004 Rubicon TJ (my dream car!) but Brady couldn't get in the Jeep easily. I liked the idea of using a stirrup step but the ones you can buy that hook over the side of the tub seemed like a potential hazard if it were to slip. Instead I made her a stirrup step that is bolted under the seat frame.
Disclaimer: The following post contains affiliate links. If you purchase a product through one of the links, I may receive a small commission (at no cost to you) that I can use to feed the platypus. And it’s always hungry.
If you liked the video be sure to give it a thumbs up on YouTube and I'd love to hear any questions or thoughts about making the stirrup step (or the Jeep in general!) that you might have so be sure to let me know in the comments section!
If you're not already a subscriber consider subscribing and if you want to see more projects like this one be sure to check out my other projects on this site!
Until next time, Go Billd Yourself!
Don’t miss a thing!
Subscribe to get the latest content
How to Restore a Compressed Car Seat Cushion Edge (Jeep TJ)
I recently bought a 2004 Rubicon TJ (my dream car!) and made a video about it. The left side of the driver’s seat cushion was compressed and worn out so I restored the foam as well as I could without replacing it.
Disclaimer: The following post contains affiliate links. If you purchase a product through one of the links, I may receive a small commission (at no cost to you) that I can use to feed the platypus. And it’s always hungry.
No materials needed for this one, just tools and labor!
If you liked the video be sure to give it a thumbs up on YouTube and I'd love to hear any questions or thoughts about restoring the seat cushion (or the Jeep in general!) that you might have so be sure to let me know in the comments section!
If you're not already a subscriber consider subscribing and if you want to see more projects like this one be sure to check out my other projects on this site!
Until next time, Go Billd Yourself!
Don’t miss a thing!
Subscribe to get the latest content
How to Install a Double Din Head Unit and Speakers in a Jeep TJ
I recently bought a 2004 Rubicon TJ (my dream car!) and made a video about it. One of the first things I did was to upgrade the head unit and speakers.
Resources:
For car audio, I recommend using Crutchfield.com (not sponsored FYI, just really like them). They're who I've used for every car audio install I've done as they make it really easy to get all the parts you need for your specific vehicle. Pick your vehicle (make, model, year, and options) and their gear selector shows you products that fit your vehicle. Select your gear (head unit, speakers, etc.) and the installation parts (wiring adapters, dash trim, etc.) are included for free up to $50 and discounted if they are over that. They also have excellent customer support and make it as easy as possible to do a DIY car audio install, you can learn more here.
Get $10 when you create a Crutchfield account using my referral link here.
Disclaimer: The following post contains affiliate links. If you purchase a product through one of the links, I may receive a small commission (at no cost to you) that I can use to feed the platypus. And it’s always hungry.
If you liked the video be sure to give it a thumbs up on YouTube and I'd love to hear any questions or thoughts about installing the head unit and speakers (of the Jeep in general) that you might have so be sure to let me know in the comments section!
If you're not already a subscriber consider subscribing and if you want to see more projects like this one be sure to check out my other projects on this site!
Until next time, Go Billd Yourself!
Don’t miss a thing!
Subscribe to get the latest content
How to Restore Speakers with Wood Veneer
I have some old floor standing speakers that were in pretty bad shape. The vinyl was bubbling and peeling and the speaker grill cloth was in terrible shape, but they still sounded good! They have been in my family since I was a kid and mean a lot to me so I decided to restore them using walnut veneer. Watch along to see how I did it and to learn how you can restore your speakers!
Resources:
Disclaimer: The following post contains affiliate links. If you purchase a product through one of the links, I may receive a small commission (at no cost to you) that I can use to feed the platypus. And it’s always hungry.
(most materials available at your local home improvement store)
Walnut Veneer
Wood Glue
Tack Cloth
Wipe-On Polyurethane (Satin)
Speaker Grill Cloth (Black)
Speaker Cloth Adhesive
Hammered Machine Finish Paint (Silver)
Superglue
Felt Furniture Feet
Speaker Wire
(in order of appearance in the video)
Ratcheting Screwdriver
Heat Gun
Plastic Pry Tools
Putty Knife
Utility Knife
Router
Flush Trim Router Bit
Router Offset Base
Random Orbital Sander
Sanding Discs (120, 150 Grit)
Scraper
Brayer Roller
Clothes Iron (any iron will do, but don’t ever use on clothes after!)
Centerpunch
Portable Drill
Sanding Sticks
Awl
Hot Glue Gun
Wire Stripper
If you liked the video be sure to give it a thumbs up on YouTube and I'd love to hear any questions or thoughts about restoring the speakers that you might have so be sure to let me know in the comments section!
If you're not already a subscriber consider subscribing and if you want to see more projects like this one be sure to check out my other projects on this site!
Until next time, Go Billd Yourself!
Don’t miss a thing!
Subscribe to get the latest content
How to Make and Install a Shaker Style Range Hood Cabinet
I made a shaker style range hood cabinet for my kitchen. The range hood turned out great and making it turned out to be the easy part. Installing the range hood meant dealing with HVAC ducting, which was a new experience for me. With lots of adapters (and patience) I got the range hood installed and it looks fantastic! Watch along to see how I did it and to learn how to make one for yourself!
Resources:
Disclaimer: The following post contains affiliate links. If you purchase a product through one of the links, I may receive a small commission (at no cost to you) that I can use to feed the platypus. And it’s always hungry.
(most materials available at your local home improvement store)
Range Hood Fan Unit
Range Hood Liner
3/4" Plywood
1/2" Plywood
13/16" Birch Edge Banding
1/4" Lattice Molding
1x6 and 1x4 Boards (crown molding)
Coarse Thread Pocket Hole Screws (1 1/4", 1")
Cabinet Screws (2 3/4", 1 1/4")
Wood Screws (1 1/4")
Construction Screws (3")
Brad Nails (5/8", 1 1/4", 2")
Wood Glue
Wood Filler
Primer
Semi-Gloss White Alkyd Paint
Lazy Susan Hardware
Double Sided Tape
Plastic Cable Clamp
Power Cord
Wire Caps
Wood Shims
Flexible Caulk
1/8" Tile Spacers
Spackle
Hinge Angle Restriction Clip (Note: Clips are hinge specific)
Ducting:
7" to 6" Reducer
6" Backdraft Damper
6" Flexible Duct
6" Coupler
Rectangular to 6" Duct Adapter
Foil Tape
Sheet Metal Screws
(in order of appearance in the video)
Circular Saw
Clamping Straight Edge
Quick Grip Bar Clamps
Table Saw
Table Saw Push Blocks
Miter Saw
Measuring Tape
Angle Finder
Pocket Hole Jig
Portable Drill
Clothes Iron
Edge Banding Trimmer
Woodworking Bar Clamps
Impact Driver
Angle Gauge
Brad Nailer
Random Orbital Sander
Sanding Discs (150, 320 Grit)
Brayer Roller
Putty Knife
Centerpunch
Ratcheting Screwdriver
Anti-Cut Gloves
Offset Snips (Right Cut and Left Cut)
Level
Laser Level
Countersinking Drill Bit
Utility Knife
Caulk Gun
Painting Tools:
Extra Soft Nylon Paint Brush
6" Foam Roller
Handy Roller Cup
Roller Cup Liners
Paint Respirator
Compressor
HLVP Spray Gun
Non-Compressor HLVP Option
Air Hose
Oil and Water Separator
Yellow Teflon Tape
Mixing Cup
Paint Strainer
If you liked the video be sure to give it a thumbs up on YouTube and I'd love to hear any questions or thoughts about making and installing the range hood cabinet that you might have so be sure to let me know in the comments section!
If you're not already a subscriber consider subscribing and if you want to see more projects like this one be sure to check out my other projects on this site!
Until next time, Go Billd Yourself (and a range hood cabinet)!
Don’t miss a thing!
Subscribe to get the latest content
How to Make Shaker Style Kitchen Upper Cabinets
Should you make your own cabinets? It certainly takes a long time to do so but if you want a custom look your choices are to pay thousands for someone else to do it for you or learn how to do it yourself. In this video, I show you step by step how I made mine so you can make your own cabinets!
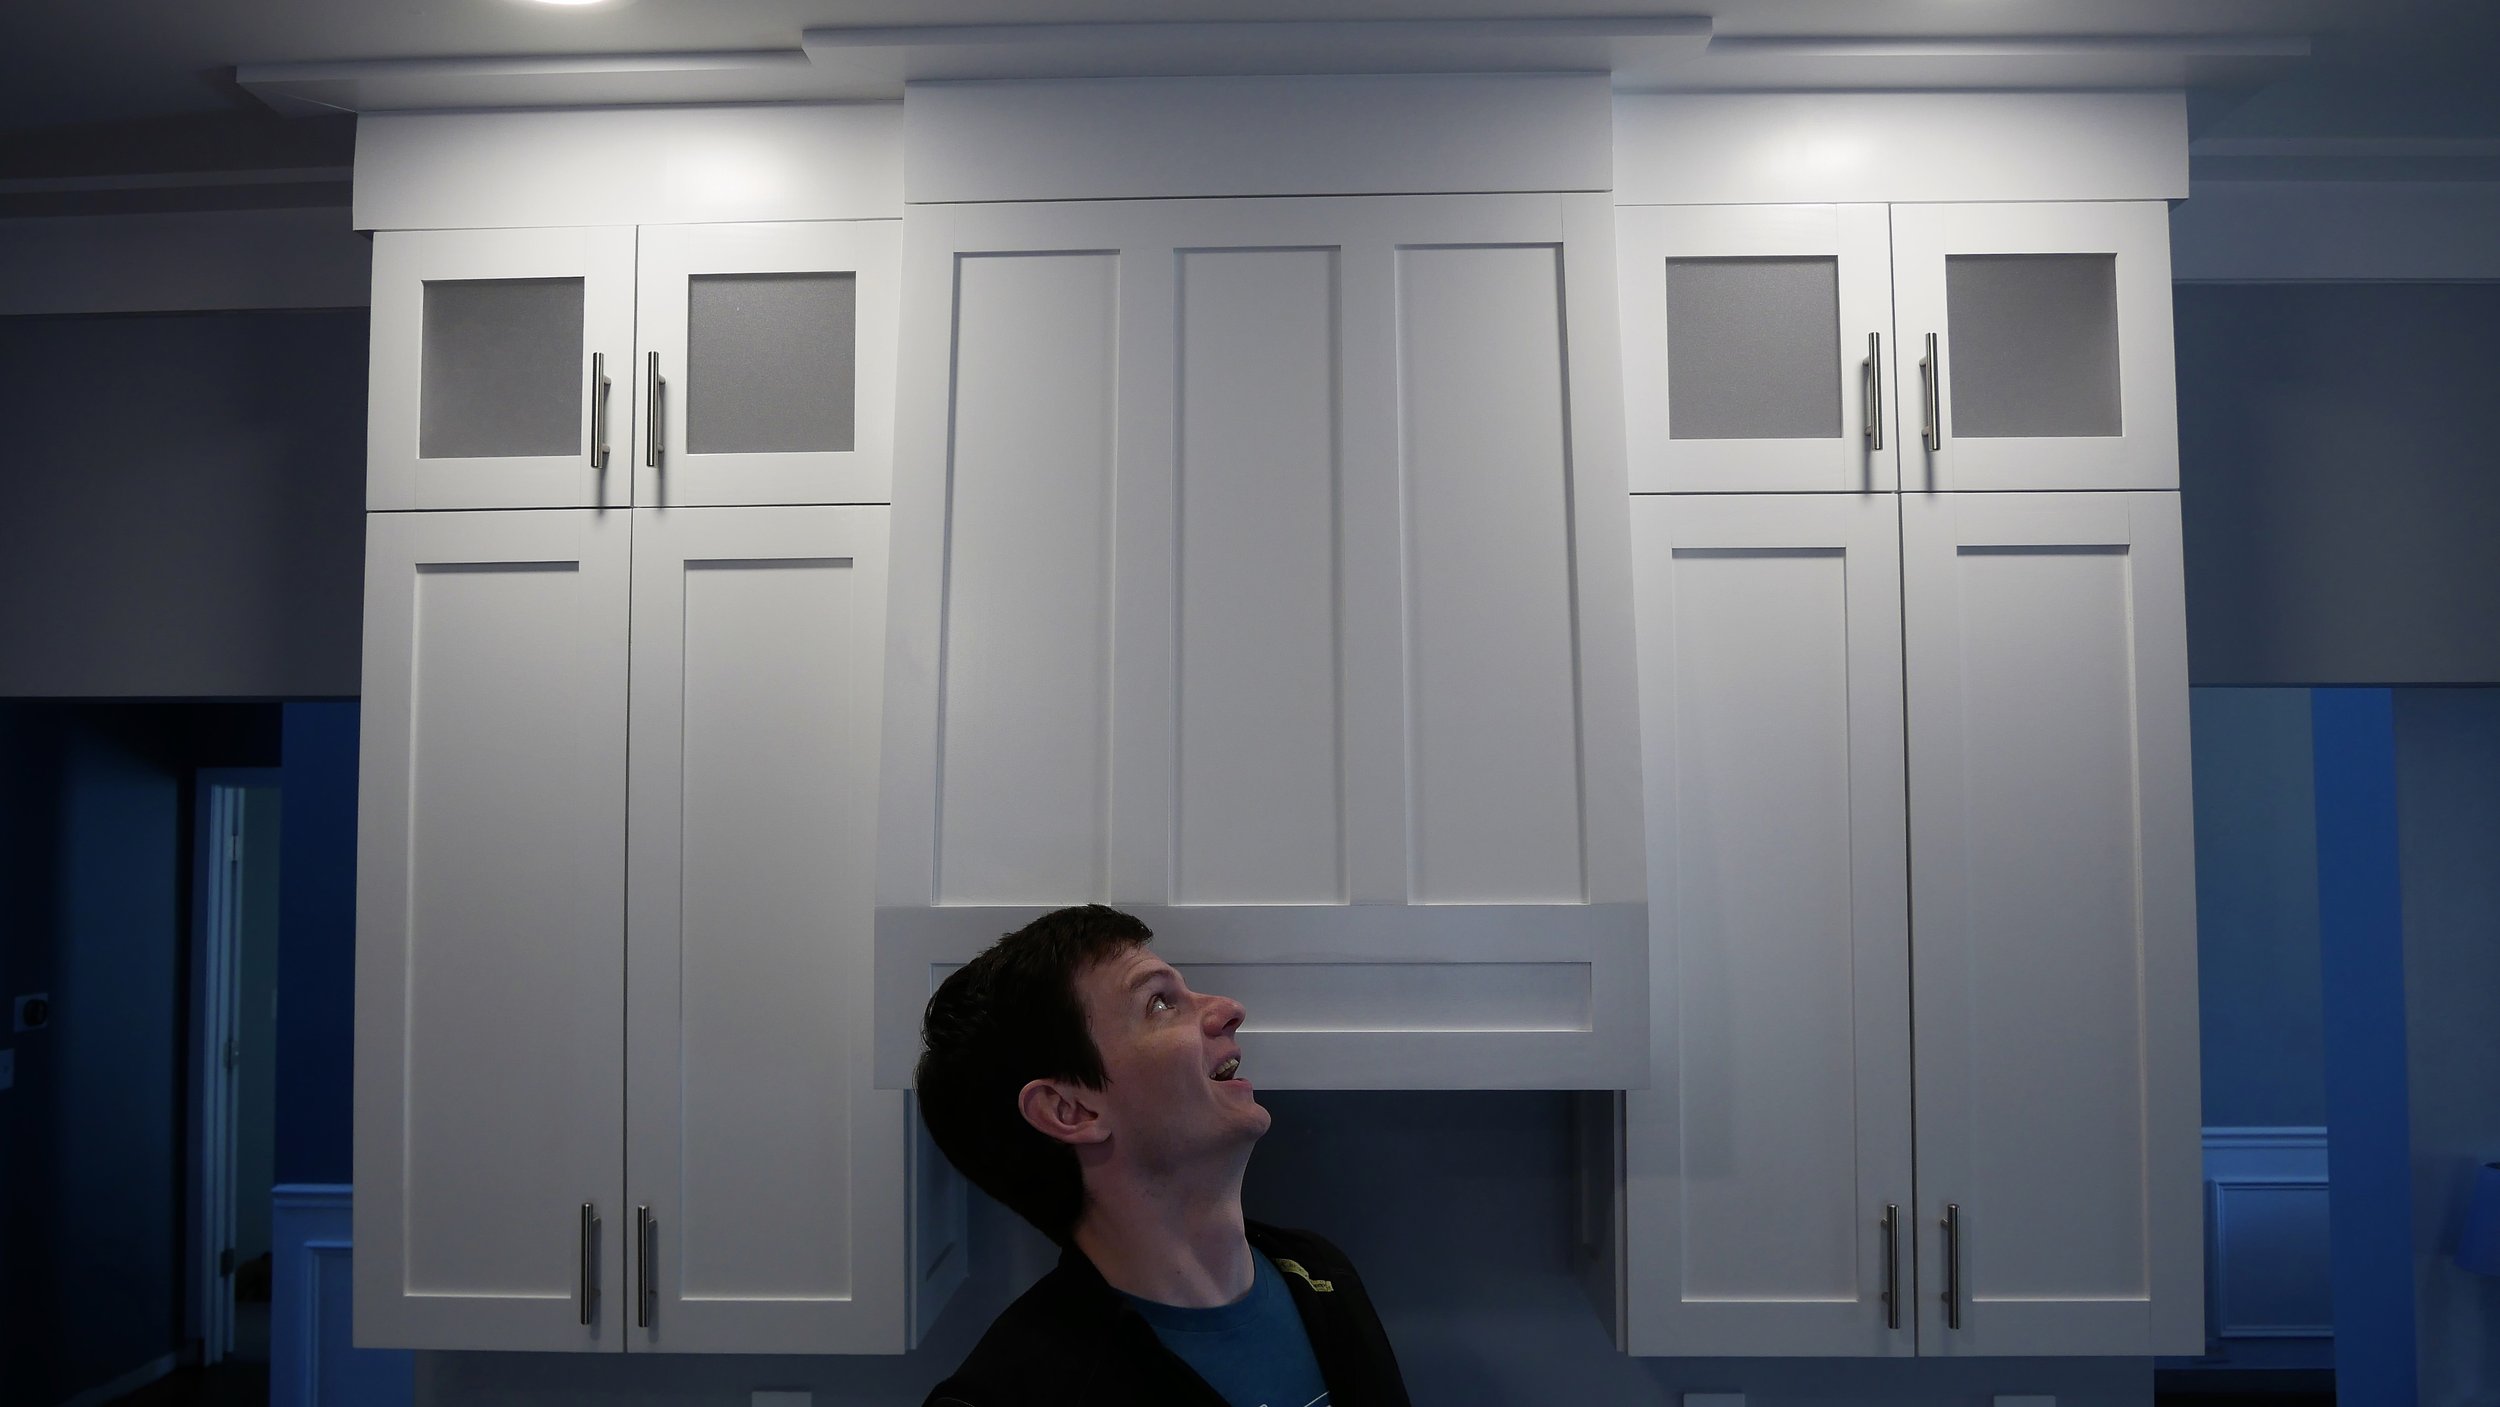
With shaker style doors and stacked cabinets near the ceiling featuring frosted glass doors, these cabinets really improve the look of the kitchen!
Resources:
FREE Supplemental Project Plans:
Disclaimer: The following post contains affiliate links. If you purchase a product through one of the links, I may receive a small commission (at no cost to you) that I can use to feed the platypus. And it’s always hungry.
(most materials available at your local home improvement store)
3/4" Plywood
1/4" 4x8 Plywood
13/16" Birch Edge Banding
1-1/4" Coarse Thread Pocket Hole Screws
Wood Glue
Clear Pine Board
3/8" Wooden Dowel
1/4" Lattice Molding
Wood Filler
Primer
Semi-Gloss White Alkyd Paint
1/2" Plywood
1/8" Polycarbonate (or plexiglass)
Frosted Glass Film
Nylon Washers
Small Pan Head Screws
Cabinet Screws
Caulk
Soft Close Frameless Cabinet Door Hinges
Adhesive Bumper Pads
Cabinet Pulls
Shelf Pins
(in order of appearance in the video)
Measuring Tape
Circular Saw
Clamping Straight Edge
Table Saw
Table Saw Push Blocks
Quick Grip Bar Clamps
Pocket Hole Jig
Portable Drill
Clothes Iron
Edge Banding Trimmer
Right Angle Clamp
24" F Clamps
Impact Driver
Miter Saw
Wood Glue Brush
Brad Nailer
Flush Cut Saw
Shelf Pin Jig
Putty Knife
Random Orbital Sander
Sanding Discs (150, 220 Grit)
Brayer Roller
Dado Stack
Router
Rabbeting Bit
Pattern Bit
Jigsaw (metal cutting blade)
Scissors
Squeegee
Concealed Hinge Jig
Centerpunch
Ratcheting Screwdrivers
Laser Level
Level
Utility Knife
Caulk Gun
Cabinet Hardware Jig
Painting Tools:
Extra Soft Nylon Paint Brush
6" Foam Roller
Handy Roller Cup
Roller Cup Liners
Paint Respirator
Painters Pyramid
Compressor
HLVP Spray Gun
Non-Compressor HLVP Option
Air Hose
Oil and Water Separator
Yellow Teflon Tape
Mixing Cup
Paint Strainer
If you liked the video be sure to give it a thumbs up on YouTube and I'd love to hear any questions or thoughts about making the upper cabinets that you might have so be sure to let me know in the comments section!
If you're not already a subscriber consider subscribing and if you want to see more projects like this one be sure to check out my other projects on this site!
Until next time, Go Billd Yourself!
Don’t miss a thing!
Subscribe to get the latest content
How to Make Your Own Faux Marble Countertops From Plywood and Save Thousands $$$
Countertop paint kits are a pretty common DIY project but they assume you have existing counters! I didn't have existing countertops to work with, so I made my own from plywood and maple wood edging. In this video I show you step by step how I did it so you can make your own countertops and save thousands!
I don't like spending money. But I'm very particular and I like nice things. The 2 don't often go together… and that's a big part of why I end up making so many things!
I have a medium sized kitchen with about 43 square feet of countertop space and using an estimate of $70 a square foot to install marble countertops puts the cost of the counters over $3000… yikes. In total the materials for this project cost approximately $510 for a savings of well over $2000 and the counters look fantastic!
Resources:
Disclaimer: The following post contains affiliate links. If you purchase a product through one of the links, I may receive a small commission (at no cost to you) that I can use to feed the platypus. And it’s always hungry.
(most materials available at your local home improvement store)
Giani Marble Epoxy Countertop Kit
1/2" Plywood
3/4" Plywood
3/4" Maple
Extend Wood Glue
1" Washer Head Screws
1 1/2" Washer Head Screws
Wood Glue
Wood Filler
5" Sanding Discs
Painters Tape
Tack Cloth
Roller Tray
Makeup Brush
Countertop Support Brackets
Mending Braces
Caulk
(in order of appearance in the video)
Circular Saw
Quick Grip Bar Clamps
Dust Mask
Large Wood Glue Brush (fur removal broom)
Impact Driver
Router
Flush Trim Router Bit
Speed Square
Measuring Tape
Drywall Square
Clamping Straight Edge Guide
Jigsaw
Table Saw
Wood Glue Brush
Brad Nailer
Miter Saw
Oscillating Multitool
Nail Set/Centerpunch
Portable Drill
Putty Knife
Orbital Sander
Handheld Router
Router 1/8" Round Over Bit
Chisels
Portable Drill Guide
Hole Saws
Utility Knife
Router 3/8" Pattern Bit
Drill Press
Caulk Gun
If you liked the video be sure to give it a thumbs up on YouTube and I'd love to hear any questions or thoughts about making the countertops that you might have so be sure to let me know in the comments section!
If you're not already a subscriber consider subscribing and if you want to see more projects like this one be sure to check out my other projects on this site!
Until next time, Go Billd Yourself!
Don’t miss a thing!
Subscribe to get the latest content
How to Make a Desk Table Top from Hardwood Flooring
In this video we’re making a large custom table top to use as a crafting desk. I have an eight foot wide loft area upstairs and I wanted to put a desk there for crafting, but finding a desk that large was difficult! I had already made a similar desk for Brady (Mrs. Billd) and we really liked it so I decided to make another to fit the loft area. Made from plywood and oak hardwood flooring, this design can be modified to make table tops of a variety of sizes and is a fairly simple build that beginner woodworkers can tackle!
Resources:
Disclaimer: The following post contains affiliate links. If you purchase a product through one of the links, I may receive a small commission (at no cost to you) that I can use to feed the platypus. And it’s always hungry.
(most materials available at your local home improvement store)
3/4" Plywood
2 1/4" Select Red Oak Hardwood Flooring
(Note 7/21: unfinished hardwood flooring is in short supply currently, it will be more expensive at your local flooring store but they may have it in stock, that's where I found it)
8 ft Oak Board
Wood Glue
Wood Glue Brush
#8 1 1/4" Trim Screws
#8 1 1/4" Washer Head Screws
Wood Filler
5" Sanding Discs
Tack Cloth
Dark Walnut Stain
Semi-Gloss Polyurethane
Oil Based Finish Brush
Mineral Spirits
Felt Furniture Pads
If you liked the video be sure to give it a thumbs up on YouTube and I'd love to hear any questions or thoughts about making the table top that you might have so be sure to let me know in the comments section!
If you're not already a subscriber consider subscribing and if you want to see more projects like this one be sure to check out my other projects on this site!
Until next time, Go Billd Yourself!
Don’t miss a thing!
Subscribe to get the latest content
How to Upgrade Your Garage or Shop Lighting
Learn how to add more light in this illuminating post
If you use your garage as a shop, you almost can’t have too much light. My garage lighting was decent but decent lighting doesn’t really cut it in a shop environment. The corners of the garage were pretty dark (good hiding places for monsters) and I found that on days when I spent long hours in the garage I was getting headaches from eye strain. There were also lots of shadows when my back was turned to the lights, which makes detail work difficult and interferes with the quality of my video recordings.
I had a few options for how to add the lights, but I thought that surface mounted boxes and metal conduit (EMT) would be the best option for a shop or garage environment.
Disclaimer: The following post contains affiliate links. If you purchase a product through one of the links, I may receive a small commission (at no cost to you) that I can use to feed the platypus. And it’s always hungry.
(most materials available at your local home improvement store)
LED Lights
Lighting Extension Box
Grounding Screws
1/2" Set-Screw Connectors
Push-In Wire Connectors
1/2" EMT Conduit
Drywall Anchors
Surface Mounted Ceiling Box
1/2" Strap Hangers
1" Hex Head Screws
14 Gauge Solid THHN Wire (Black and White)
Light Fixture Base
(in order of first use in the project)
Screwdrivers
Tongue and Groove Pliers
Pipe Cutter
Conduit Reamer
1/2" Conduit Bender
Stud Finder
Impact Driver
Fish Tape
Wire Strippers
Linesman's Pliers
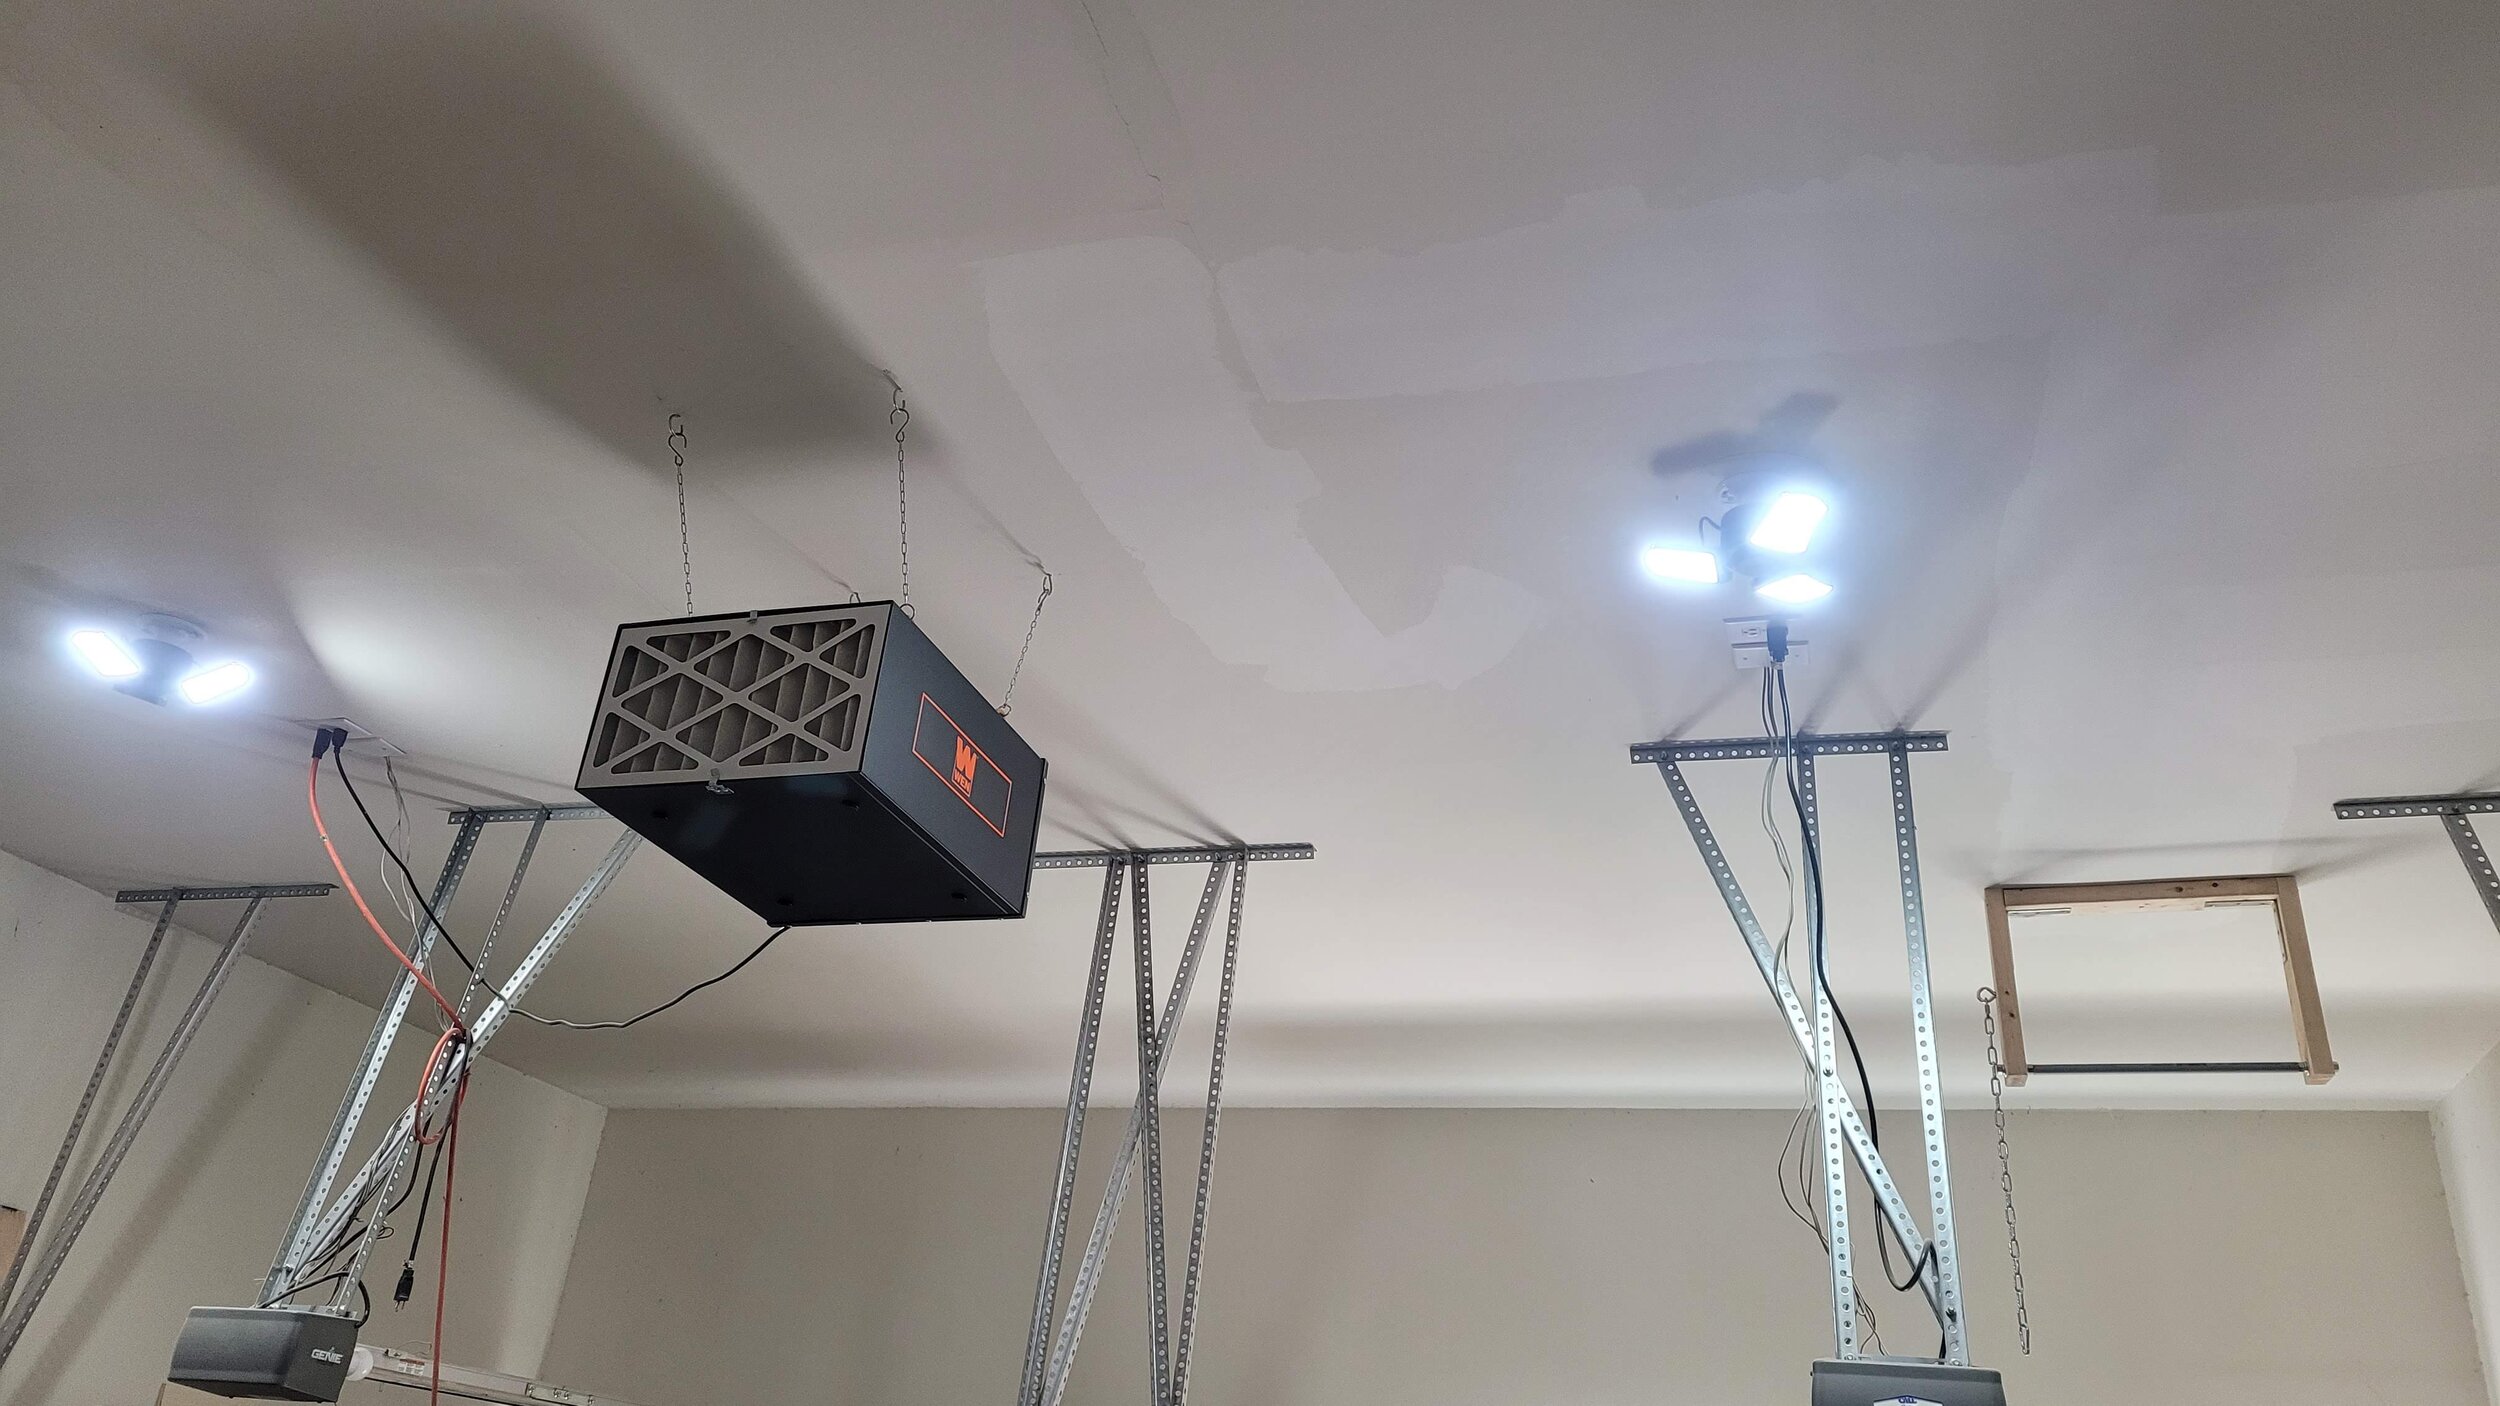
When Brady and I first moved into this house, I quickly improved the lighting in the shop by replacing the existing lights with these 2 LED lights (linked in the materials list above). These lights helped a lot, but I’ve been looking forward to improving upon them for a while now!
I began by shutting off the power to the lights at the breaker and the switch controlling the lights, and removed the light from the fixture base. Then I took the existing light fixture down leaving the old wires sticking out.
The first thing we need to decide when doing this is how were going to bring the wires through the ceiling and into the surface mounted box so we can run conduit for the other lights. There are a few approaches to this which I’ll list below:
Remove the existing in-ceiling electrical box and patch the drywall. Then bring the Romex cables through a small hole in the drywall and install a surface mounted ceiling box on top of the drywall, securing the cables using a conduit clamp. This is probably the most robust option, but is also more work as you’ll need to repair the drywall first.
Install a square extension box (which for some reason is not sold in stores) on top of your existing in-ceiling electrical box and add a mud ring for the light fixture to mount to. The existing light box is likely attached to one of your ceiling joists that runs either perpendicular or parallel to your walls and using this extension box should put the knockouts in the box square to the walls (but be sure to check this before ordering!). I recommend this option for most people.
Install a lighting extension box (materials list). The way the mounting holes on the extension box are oriented will determine where the knockouts are. They’ll likely be at 45° to your walls, which makes bending the conduit more difficult and this is probably the worst option of the 3 for most people.
So of course, I picked option number 3.
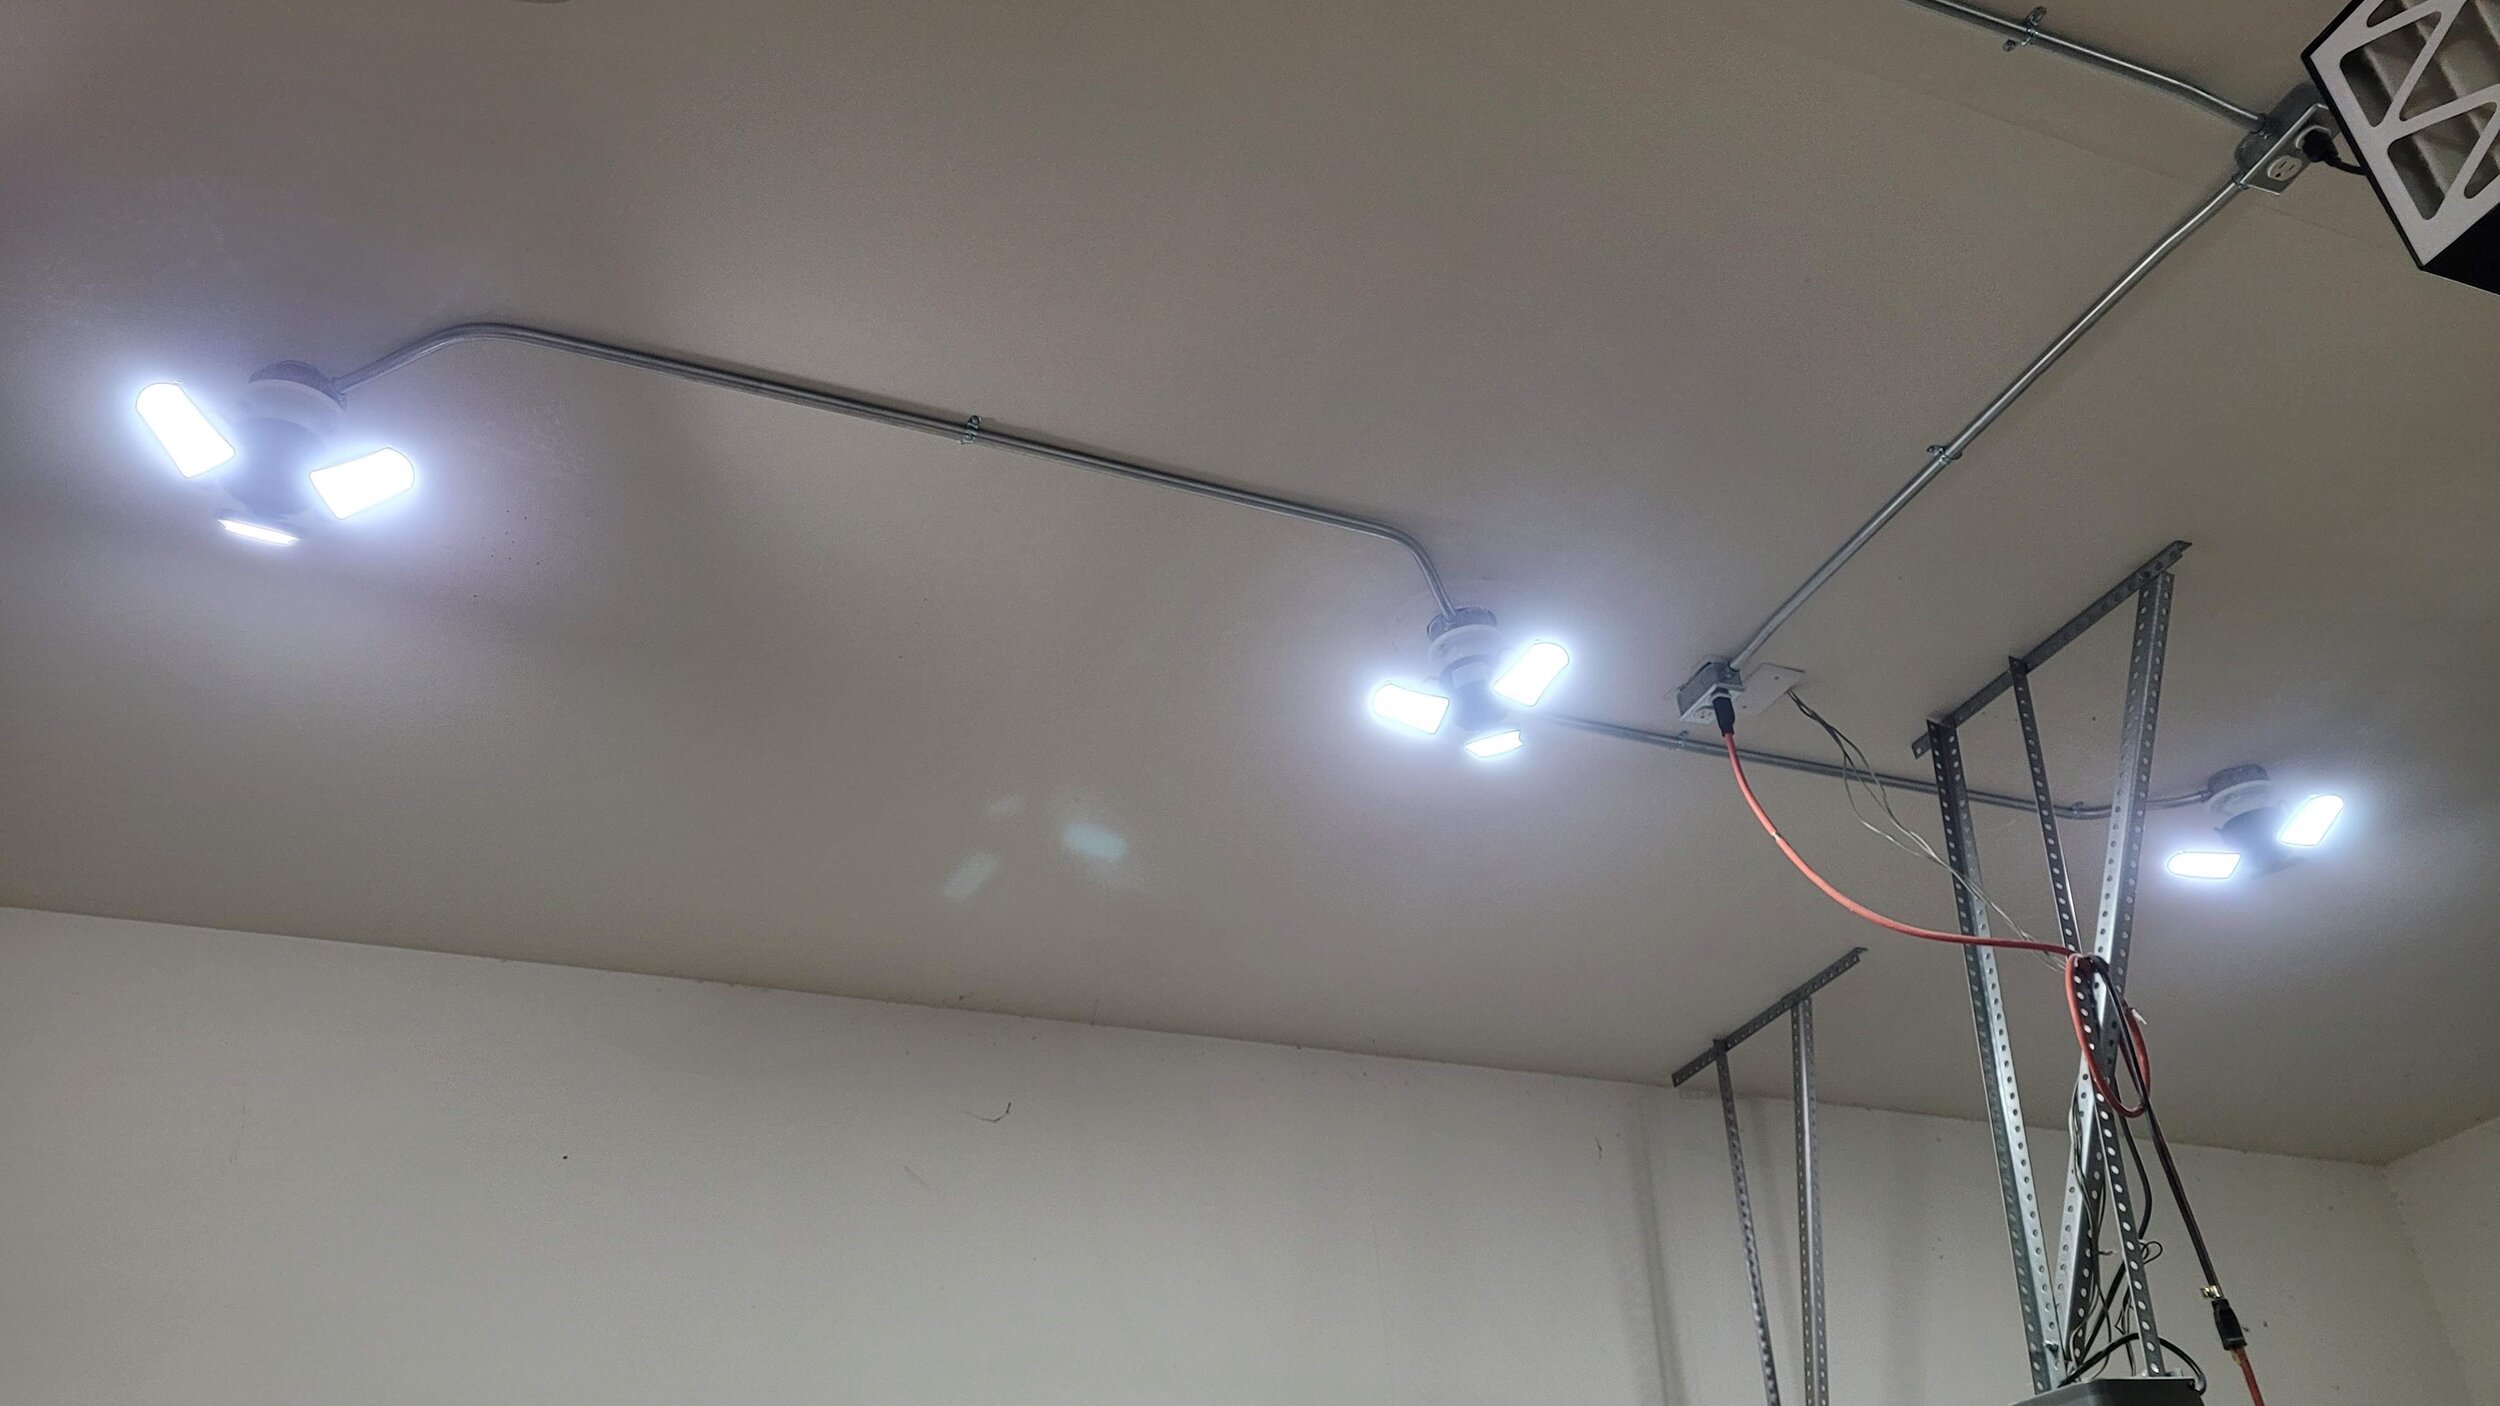
I have garage door opener outlets and mounting supports in between my existing light fixture and where I want to put the other lights and as I have to go around those anyway… I figured I’d just come out from the box, 45° bend back towards the other box, a long straight run, then a 45° bend back towards the other box. The picture below should give you an idea of what the heck I’m jabber jawing about.
I prepared the extension box by removing the 1/2” knockout plugs (it also has 3/4 knock out plugs, don’t remove those), hitting a screwdriver with a hammer to start the plug loose and then bending the plug back and forth with pliers until it broke free.
Extension boxes don’t come with a hole for a ground screw so I drilled and tapped a (10-32) hole for one. This lets the metal conduit raceway act as the ground so you don’t have to run a ground wire to each box through the conduit. It’s likely you don’t have metal taps to do this with so… to ground the circuits if you use an extension box you have a few options:
Use a grounding clip to ground the extension box. This is the easiest option, that is if the clip(s) don’t break when you’re trying to install them (a common problem in reviews)
Run a ground wire (green thhn or bare) to each box, like you would have to do if you were using pvc conduit. This ground needs to be the same gauge as the thickest gauge wire in any of the circuits running in the conduit
Run a single ground to the closest surface mounted box and attach it to the ground screw mounting point. All the connected metal conduit will then be grounded
I also added 1/2” set-screw connectors to the 1/2” knockouts on each side of the box. The easiest way to install these is to tighten the metal ring by hand with the set-screw about 1/4 turn away from the screw pointing straight up away from the fixture side of the box and then use a tongue and groove plier to grab the set-screw connector and tighten that an additional 1/4 turn. Since the locking ring was already snug and grabbing against the inside of the box it will stay in place and tighten the whole connector.
Once the extension box was fully prepared I mounted it loosely to the existing ceiling box. I added 4 port push-in wire connectors to the hot (black) and neutral (white) wires so that I can plug in the wires for the light on this fixture as well as the the other 2 lights that are going to be run off of this box. I also wrapped the ground wire around the ground screw and tightened it down (not pictured)
Once the box was up I marked where I wanted my other light locations (~5 feet in each direction) and then set about cutting and bending the metal conduit to run between the fixtures. Figuring out the length of conduit needed and bending conduit is a skill that’s too complicated to cover in detail in this post. Instead, I’ll give some tips about what I learned for this application and tell you how to install the fixtures still using metal conduit, but without needing to make any bends. If you have any questions, feel free to reach out in the comments at the bottom of this post!
I figured out the total length of my conduit after accounting for the various bends I needed (offsets, 45° turns) and cut it with a small pipe cutter. Thanks for letting me steal borrow the pipe cutter Dad!
Note: Things are about to get a little complicated and bendy but I promise I’ll explain the easier way to do this right after!
Cutting conduit with a pipe cutter leaves sharp burrs on the inside edge that need to be cleaned up so the insulation on the wires doesn’t get damaged as it’s pulled through. A conduit reamer like the one in the materials list is the correct tool to deburr this inside edge. I didn’t have one at the time so I spun the side of a 1/2” drill bit against the inside edge and that worked well as a substitute.
I marked my conduit on each end for all the bends I’m doing (lots of calculations go into figuring out where to put the marks). I put marks for the start and end of the box offset and one mark for the start of the 45° bend. Putting a zip tie around the conduit is an easy way to draw a circle all the way around at each mark.
To bend the box offset I put my first mark at the offset location in my bender and bent to just under 10°. Then I flipped the conduit over (180°) and bent another slightly less than 10° at the second mark. I found that putting the first mark at the end of the set-screw connector (5/8”) and the second 2 7/8” away from the first (3 1/2”) and using just under 10° bends results in good offsets for 1/2” conduit.
The box offset is necessary as the bottom edge of the conduit enters the box about a half inch above the base of the electrical box and without the offset the conduit would be about a 1/2 inch away from the ceiling/wall.
But wait! I told you I’d show you a way to do this without bends! And I’m no liar (hush platypus!)
You can use offset set-screw connectors instead of normal set-screw connectors to avoid needing to bend an offset. Using one of the square boxes mentioned earlier (options 1 and 2), making straight runs between boxes, and using the offset set-screw connectors will allow you to do this project without the need for bends. That does make the assumption that there is nothing in the path of where you want to put your conduit runs, which is often not the case…
If you don’t see yourself doing many conduit projects then the offset connectors are a good option. However, they’re a bit expensive and if you see yourself doing more conduit work in the future (as I did)… you probably ought to invest the time now and learn how to make offset bends.
Once I was done ranting about offset bends, I bent a 45° (perpendicular to the plane of the offset bends) to direct the conduit back towards the other light like I mentioned earlier. This is all a bit complicated but the good news is you probably don’t need to do it this way!
Then I mirrored the bends for the other end of the conduit.
If you do choose to learn to bend conduit I just want to say… buy extra conduit and be patient with yourself! I made tons of mistakes as I went and many times it took me screwing up a bend before I began to understand how it was supposed to be done. There are people that do this for a living and we are not them!
If you’re interested in learning to bend conduit more so than what’s covered in this post, here’s a good resource that I referenced often while I was learning.
I put my conduit in place between the extension box on the existing light fixture and a surface mounted box and lined up the surface mounted box with the mark I made earlier for the light fixture location. Then I marked the mounting holes in the surface mounted box. It’s fine if the box doesn’t fall right on top of the location mark you made earlier as long as its close.
I took the box down, installed drywall anchors on my marks, inserted the conduit back into the set-screw connectors (not pictured, but do this before screwing the box in place), and put the box back up adding washers to the screws that attach it to the drywall anchors.
I put the conduit up and used a stud finder to find the nearest joist and screwed in a strap hanger (and yes, I know I missed the first time!). I recommend using the 2 hole hangers for ceiling runs. To meet code, metal conduit must be secured at least every 10 feet and within 3 feet of every box.
Once the conduit was secured, I tightened the set-screw connectors at the box on each end.
I added another conduit run to the other side of the existing light fixture and secured the conduit and the other new box in place.
Then I ran a fish tape from the existing light box through to the new box and hooked on two 14 gauge thhn wires, one black and one white. You don’t really need a fish tape with only two wires and a run this short, you should be able to simply push the wires through the conduit (assuming solid not stranded thhn), but it does make things easier.
BE SURE to check the amperage of the circuit (printed on the breaker in the electrical panel) that controls your lights and use the correct gauge wiring! Most lights will be on 15 amp circuits (14 gauge wire), however it’s possible for them to be on a 20 amp circuits (12 gauge wire) so do not assume!
I pulled the wires through and bent them over the edge of the entry into the extension light box. You want around 6-8 inches of wire coming into the box.
I went to the surface mounted box end and cut the wires, again leaving 6-8 inches. Then I used wire strippers to remove the last 3/4 or so of insulation and bent hooks in the wires using lineman’s pliers to attach to the light fixture.
I hooked the wires over the screws (black to gold (hot), white to silver) and tightened them down. Be sure to orient the hooks so tightening the screw pulls the wires in further instead of pushing the wire out. There’s no ground needed for these particular light fixtures, but if it was needed I would have run a green thhn or bare wire from the ground screw in the box to the fixture
Then I bent the wires to fit in the box, slotted the fixture in place, and tightened the mounting screws. The light fixture bases are fragile, so don’t tighten too much and crack the base…
I repeated for the other new light, and then moved to the extension box to wire everything together. I plugged the two new hot wires (black) into the connector with the black wire and added a 4th short wire hooked at the end for the light fixture here. I then did the same for the neutral (white) wires.
I added a light fixture base here as well and then screwed in the new lights. These lights are great for a shop since they replace a single bulb with a whole bunch of LEDs that you can adjust the angle on to make sure they’re aimed where you want
I added another two lights coming from the existing light on the other side of the garage and we’re done!
I hope this post brightened your day! All I know is it really shines some light on what a mess my garage is… ok ok I’m done with the word play. I’d add more but I want to keep this post [REDACTED] on puns.
You can look through the photos below to see a comparison. It’s not nearly as obvious a difference in the photos as it is in person but it’s super bright now! You can see a lot less shadows in the after photo which is a good representation of the light coverage.

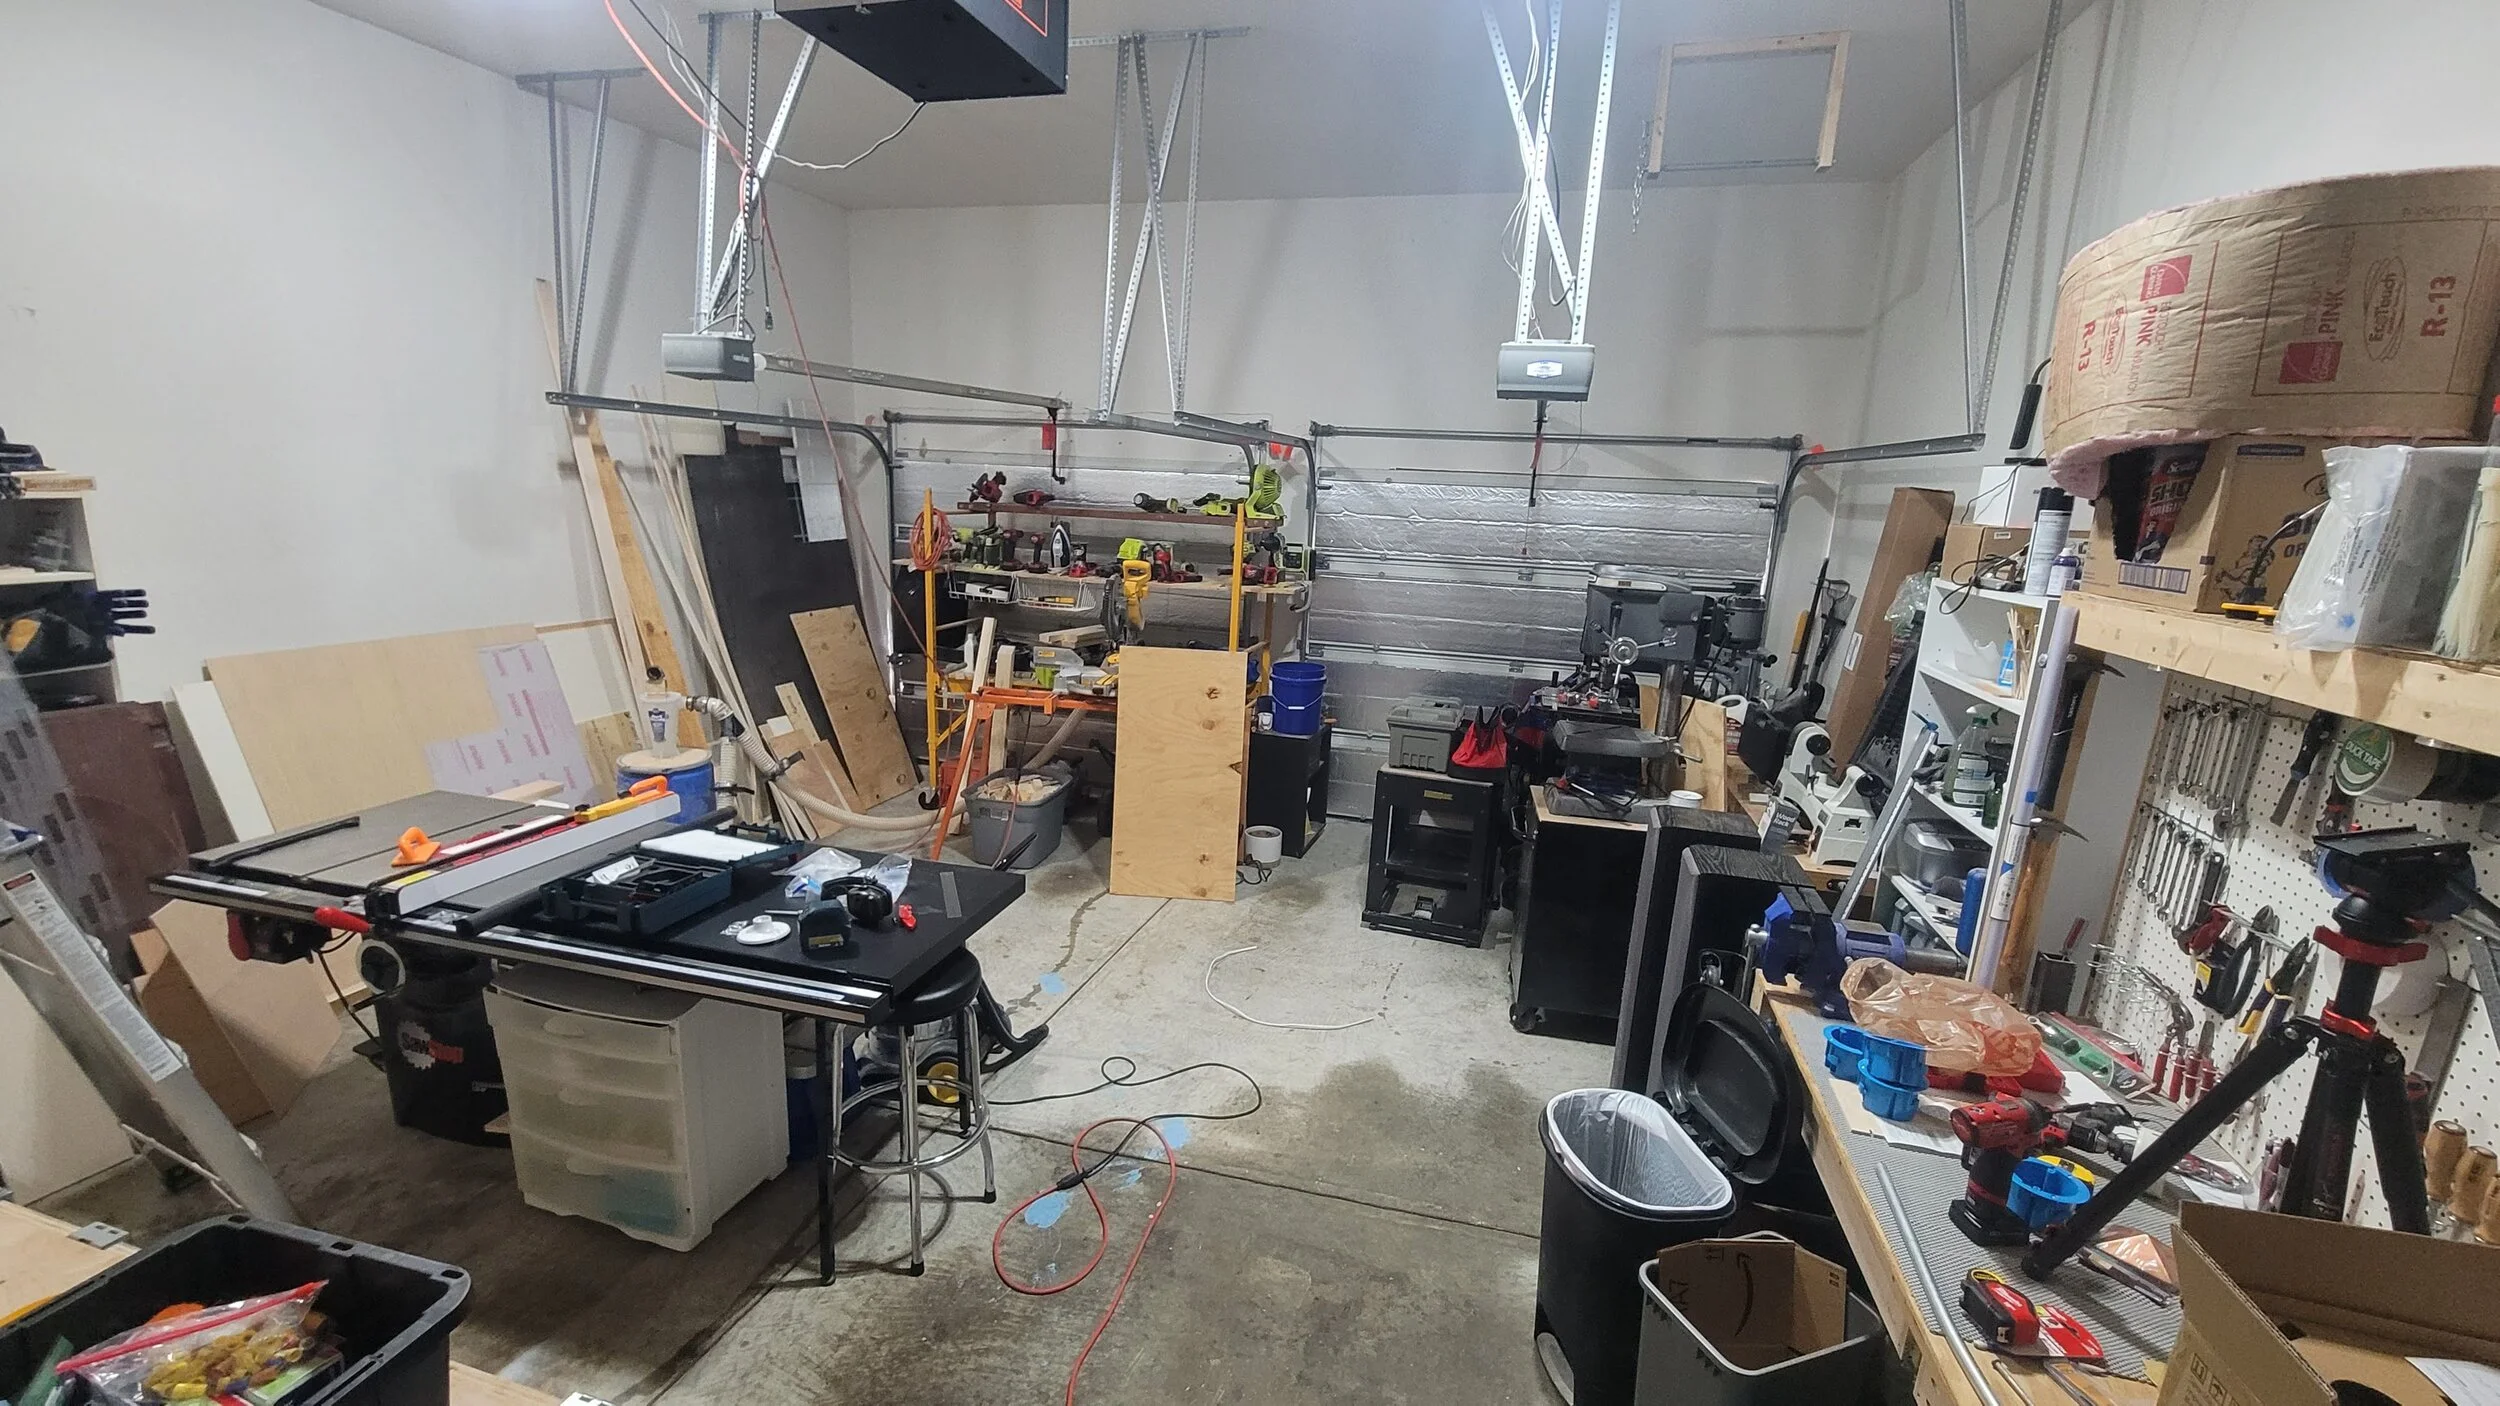
I'd love to hear any questions or thoughts about adding the lights, bending conduit, etc. that you might have so be sure to let me know in the comments!
If you're not already subscribed to Project Billd content you can do that here and if you want to see more projects like this one be sure to check out my other projects on this site!
Until next time, Go Billd Yourself!
Don’t miss a thing!
Subscribe to get the latest content
Making a Custom Kitchen Island Light Fixture
Brighten up your space with this custom kitchen light fixture!
When Brady and I moved into our project of a house, the kitchen had only one light fixture (which looked like it belonged in a workshop) so I removed that fixture and added recessed lights using that existing circuit, which I show you how to do in this video here.
Shortly after, we decided that we also wanted separate lighting over where we were going to put the new island, so I added a circuit and started thinking about what kind of lights we might want to put up there. With no previous light fixture I was left with pretty much a blank slate. We decided we wanted 3 pendants but weren’t sure about the look (or permanence) of installing them right on/into the ceiling, so I came up with a simple design for a box to mount the pendants to that adds depth to the fixtures.
It’s just another part of the never-ending kitchen renovation going on here at Project Billd…
Resources:
FREE Supplemental Project Plans
Disclaimer: The following post contains affiliate links. If you purchase a product through one of the links, I may receive a small commission (at no cost to you) that I can use to feed the platypus. And it’s always hungry.
(most materials available at your local home improvement store)
3/4" Plywood
13/16" Birch Edge Banding
Wood Filler
Pocket Hole Screws
Primer
Semi-Gloss White Paint
Pendant Lights
2x3 Pine
Construction Screws
Toggle Bolts
Trim Screws
I started making the kitchen light fixture by cutting a large piece for the base and two strips for the sides on the table saw.
Then I cut the strips to length with 45° miters using my miter saw.
I drilled evenly spaced pocket holes into the strips so I’d have a way to attach them to the base.
And applied edge banding to the 4 edges of the light fixture base.
I added 3/4 inch deep reveal lines as reference for setting the wooden strips back from the edge.
And drilled 3 holes through the base for the center of the light fixtures.
I placed a pendant light wire through one of the holes that I just drilled and marked the 2 screw mounting holes for each pendant light.
Next I drilled out the screw holes for each of the pendant lights, making sure the hole was just big enough for the screw to fit through.
I clamped the strips for the sides of the fixture in place up to my reveal lines and screwed it down to the base below.
I tacked the mitered corners together with my brad nailer.
I filled the holes with wood filler. When they were dry I sanded them smooth and it was time for paint!
Brady used a small foam roller to paint the fixture. Here’s what it looks like after two coats of white semi gloss paint!
I attached the pendants to the light fixture by putting the mounting screws through the back and tightening the provided nuts down onto the ends of the screws. These lights normally mount to a bracket that attaches to a ceiling electrical box, so the screws are a fixed length. I was afraid they would either be too short or too long but I found them to be the perfect length for going through 3/4 inch plywood and attaching the light bases. If your base is a different thickness, you’re using different lights, (or if the manufacturer has changed the screws) you may have to get new screws to make this work.
I set the wire length, from the top of the light to the bottom of the mount base, to approximately 26 inches for each of the pendant lights as this puts my eye level just below the bottom of the glass of the pendant light when the fixture is installed on my ceiling. This length will vary based on your height and the room you’re putting the fixture in.
I cut the wires for each light so they’d meet at the middle of the fixture with some slack, stripped the insulation with a utility knife and the individual wires with a wire stripper, and twisted all the respective wires: hot (black), neutral (white), and ground (green/bare) together using wire nuts. However, I recommend using a connector like this instead. I’ve been using these push-in connectors in more recent projects and they would have allowed me to skip the 4th wire I added to connect to the line in the ceiling, and to just plug the wires from the ceiling directly into the 4th spot on the connectors. Much easier!
I added four 9 inch long pieces of 2x3 to the ceiling in the short direction of the light fixture, aligning them with a laser level and screwing them into the joists where possible with construction screws to give the fixture something to attach to. It would have been easier if I had been able to run 2 pieces in the direction of the long edges instead. However, the location of the fixture and the joists above determine what kind of supports you are able to put up. My joists run parallel to the long edge of the fixture so I used toggle bolts to support the closer end of the supports in the photo below where I couldn’t screw them directly to the joists above. (It’s preferred if your joists run perpendicular to the long edge of the light fixture so the supports can span multiple joists but every kitchen will be different!)
Then I put up the light fixture, first attaching the wires to the power coming through the ceiling. Be sure to get someone to help hold the fixture while you’re attaching the wires! Once wired, I screwed through the sides of the light fixture into the ceiling supports using trim screws and added some white paint to cover the heads of the screws.
I put in a some vintage style led bulbs and I‘m really happy with how it turned out!
The kitchen is coming along, and at this rate it will be beautiful in 10 short years!
I'd love to hear any questions or thoughts about making the light fixture that you might have so be sure to let me know in the comments!
If you're not already subscribed to Project Billd content you can do that here and if you want to see more projects like this one be sure to check out my other projects on this site!
Until next time, Go Billd Yourself!
Don’t miss a thing!
Subscribe to get the latest content
How to Restore a Rusted Mower Deck (and prevent it from happening again!)
Give new life to your old mower deck!
Most mower decks are covered in a coat of paint which will protect the deck from rust as long as you never, you know, actually use the mower as a mower. As soon as the blade kicks up a few rocks/pinecones/twigs against the underside of the deck you can say bye bye to your shiny paint job. And once wet grass begins to cake on that exposed metal it’s not long before you’ve got an ideal situation for rust to take over. It’s best to mow when the grass is dry, but if you live in a humid area (NC summers eek) and your grass is still wet even when mowing in the evening after a week with no rain… dry isn’t always an option.
I got this mower 6 years ago and have pretty much neglected to take care of the deck since. I knew it had some rust taking place on the underside but didn’t know how bad it was. The rest of the mower shows no signs of slowing down anytime soon, so I wanted to restore the rusting deck to prevent it from rusting all the way through and having to replace the mower entirely. Mowers are kind of expensive!
In this project we’re going to not only stop more rust from occurring but also protect the mower so it doesn’t happen again!
Disclaimer: The following post contains affiliate links. If you purchase a product through one of the links, I may receive a small commission (at no cost to you) that I can use to feed the platypus. And it’s always hungry.
(most materials available at your local home improvement store)
Rust Converter
Primer
Truck Bed Coating
Anti-Seize
Non Stick Graphite Spray
(in order of first use in the project)
Impact Driver
Scraper
Face Shield
Respirator
Knotted Wire Cup Brush
Angle Grinder
Wire Wheels for Drill
Portable Drill
This post was published during the spring/early summer but that’s a product of me having a content backlog, not when I recommend doing this work! I did this over the winter between mowing seasons and highly recommend you do the same. Anyway, let’s get started!
Ooooooohhhh, so that’s what 6 years of neglect look like. And this was after removing most of the caked on grass…
Before I can restore the deck I needed to remove the engine/wheels/height adjustment mechanism, etc. The procedure for doing this is going to vary a lot for every different mower so I won’t get into the details here.
If you have a gas lawnmower I suggest you run all the gas out of the mower before doing this so gas doesn’t leak out of the engine/tank. My mower is electric so I ran the batteries down in my mower to prevent electrical stains from getting on everything… /s
If you have rusted/stubborn bolts and screws (as I did), I find that setting an impact driver/wrench set to its lowest torque setting and hammering on the bolt for a while very useful for breaking them free without snapping the bolt.
I strongly suggest taking tons of pictures and grouping small parts into labeled snack bags (including diagrams for more complicated assemblies). It always seems like you’re going to remember how it all goes together but then a 2 day project gets stretched out over a month because of competing priorities… and crap! Where does that tiny screw go?
Once I had removed all the pieces from the deck that I didn’t want to get water or paint on I used a scraper to remove the loose paint and grass.
Then I pressured washed the deck and other plastic parts outside to remove the stuck on grass. In hindsight this probably wasn’t a necessary step given what I did next.
Once dry, I started removing the rust, flaking metal, and loose paint with a knotted wire cup brush on my angle grinder. Be sure to do this somewhere well-ventilated (outside) and wear the appropriate safety gear!
See, doesn’t this make you feel safe?
I switched to a wire wheel on a drill for the areas I couldn’t get to with the angle grinder. There was some significant pitting of the metal that had begun to occur.
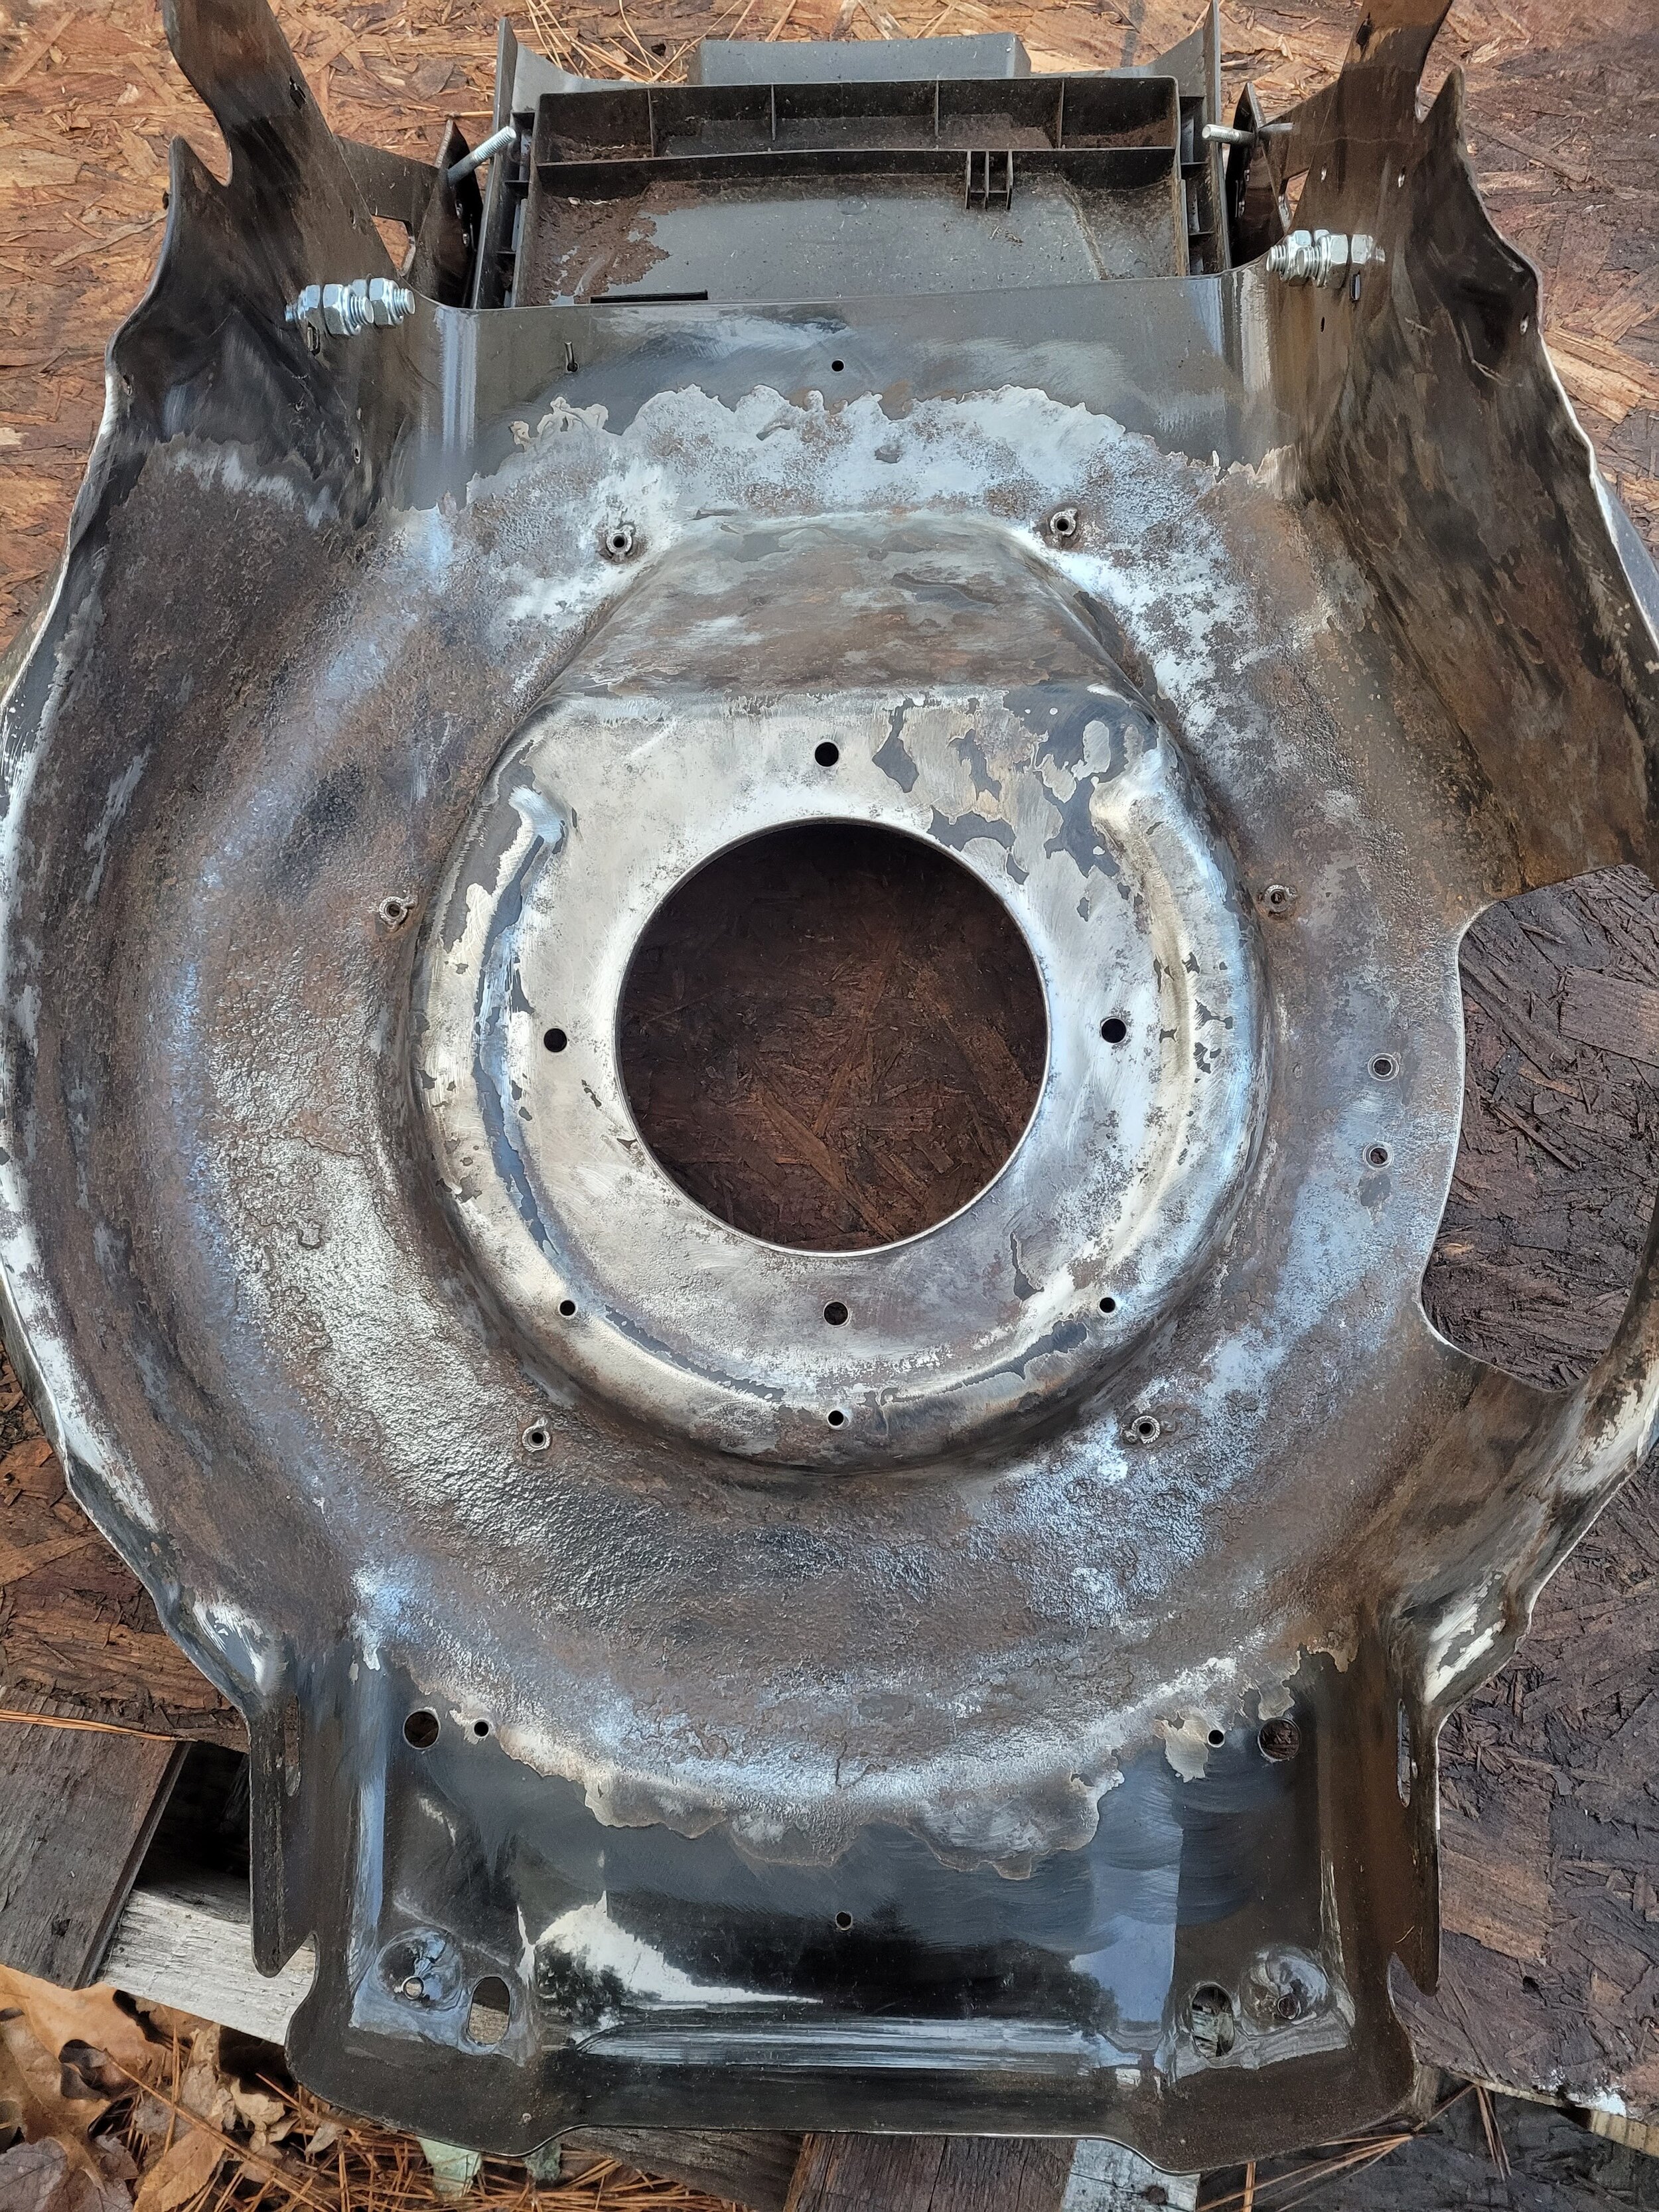
Here’s the mower deck after removing as much flaky metal, rust, and loose paint as I could, diminishing returns and all. The rust was a lot worse in the curved sections of the deck where the grass had caked on.
The deck was ready for paint so I sprayed on 2 coats of rust converter which seals the rust and turns it into a paintable surface. This likely won’t completely stop the rust, but it should slow it down a whole lot so that the mower lasts for many years to come.
I added 2 coats of a flat gray primer on top of the rust converter.
I then sprayed on 3 coats of truck bed coating. This should be a significantly more durable surface than normal paint and hold up much better when hard things get thrown against the bottom of the deck. That’s the hope anyway!
Once it was dry I began reassembling the mower in the reverse order that I took it apart. I referenced my pictures (A LOT) as it was nearly a month at this point from when I first took the mower apart.
I put anti-seize on any screws and bolts that I had trouble getting out the first time so if/when it comes time to do this again, it should be easier to get the mower apart.
Some time later and the mower is completely back together! No idea if it works at this point but it at least looks like a mower anyway. I believe some gas mowers aren’t supposed to be run without the blade attached so I wouldn’t test it quite yet unless you know it’s fine to do so.
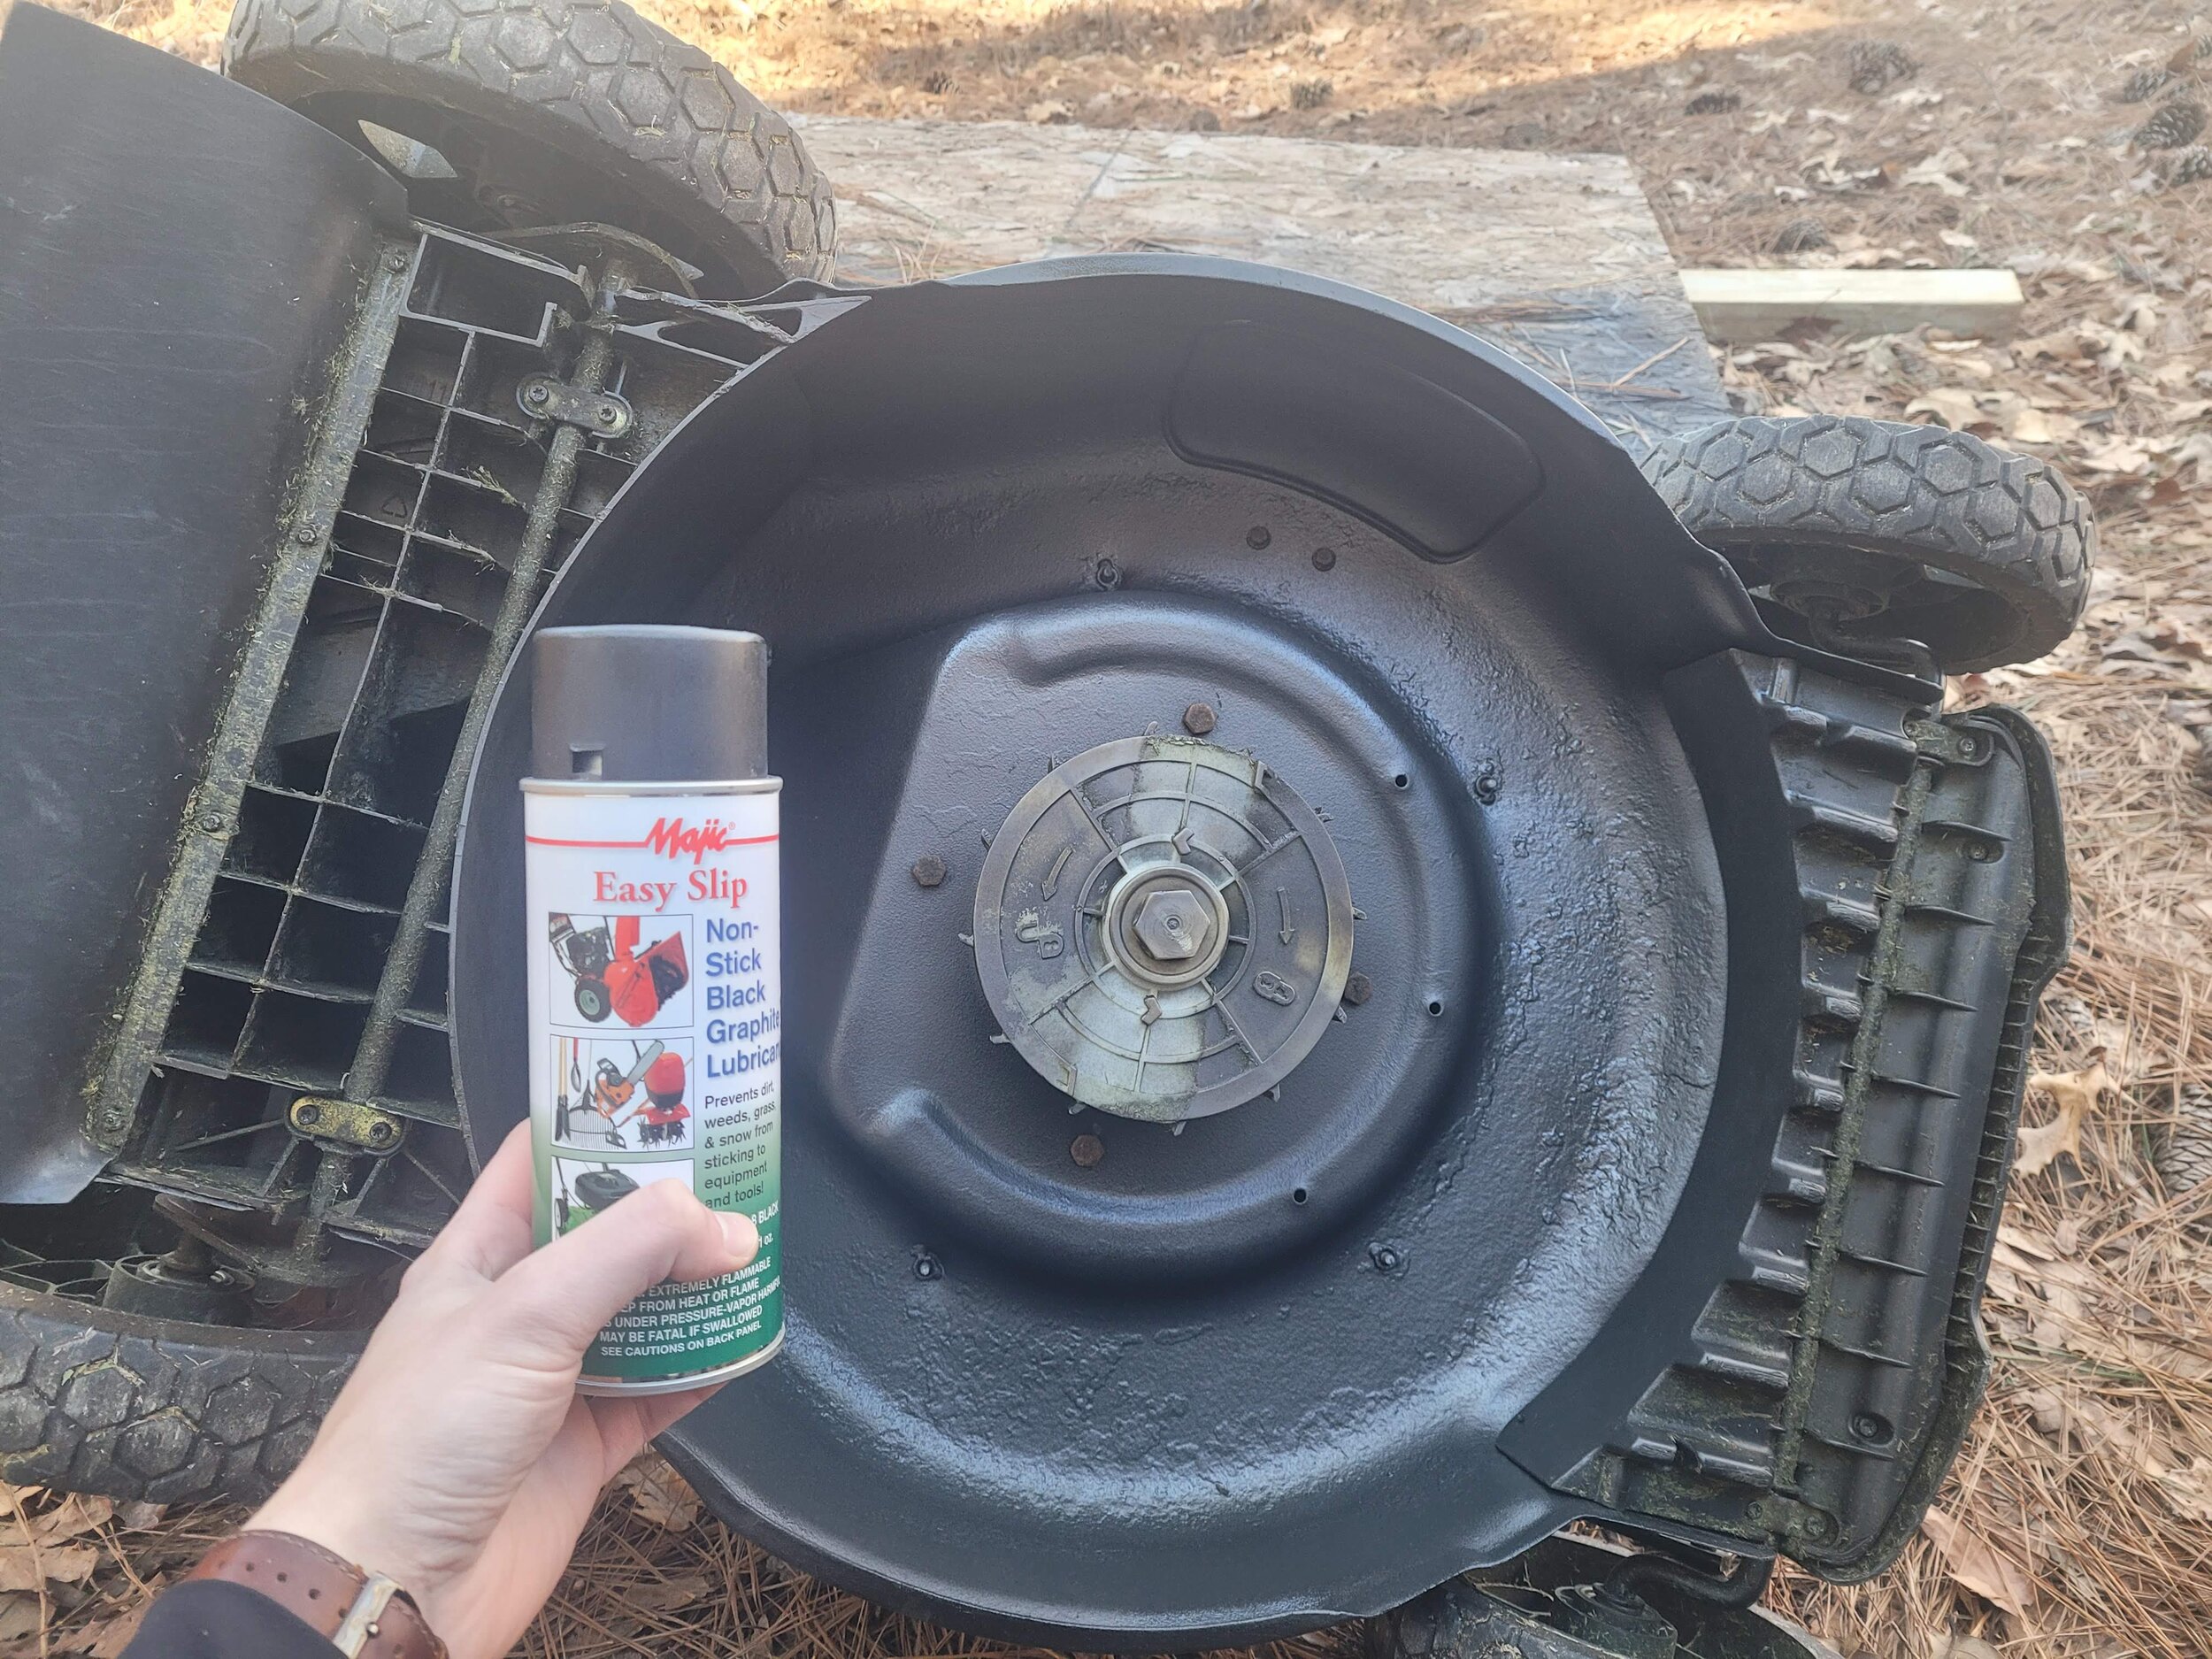
With the mower back together (minus the blade) I sprayed on 3 coats of non stick graphite lubricant spray to all of the surfaces on the underside of the mower. The spray is supposed to (in theory) keep grass or anything else from sticking. We shall see!
There were no directions on the can for recoat or cure times but from doing some research I found that that it should be recoated after about 8 hours and to allow 48 hours before use after the last coat. (So plan ahead as this takes a few days!)
I reinstalled the blade and tested the mower, and it still works! Which is great as it’s never fun to ‘repair’ something and break something else along the way.
After using the mower once, here’s what it looks like. It’s only one time, but way less grass than normal stuck to it and the undercoating seems to be holding up really well. It’s early, but I’m calling this a success!
I’ll come back and update this post with how the coatings are holding up after this mowing season!
I'd love to hear any questions or thoughts about restoring the mower deck that you might have so be sure to let me know in the comments!
If you're not already subscribed to Project Billd content you can do that here and if you want to see more projects like this one be sure to check out my other projects on this site!
Until next time, Go Billd Yourself!
Don’t miss a thing!
Subscribe to get the latest content
Making Frosted Glass Doors with 2x6s and Plexiglass
Learn how to make frosted glass doors with 2x6s and plexiglass using simple woodworking methods and common materials that you can buy from any home improvement store. I show you step by step how I made them so you can make them at home (and avoid my mistakes!)
Disclaimer: The following post contains affiliate links. If you purchase a product through one of the links, I may receive a small commission (at no cost to you) that I can use to feed the platypus. And it’s always hungry.
(most materials available at your local home improvement store)
2 x 6 x 8 Pine Boards
1/8" Plexiglass (or polycarbonate)
3/8" Wood Dowel
Wood Filler
Wood Glue
2" Pocket Hole Screws
Stain Blocking Shellac Primer
Primer
Semi-Gloss White Paint
Frosted Glass Film
1/16" Thick Nylon Washers
#6 x 1/2" Pan Head Screws
#4 x 3/8" Sheet Metal Screws
White Latex Caulk
Bypass Door Hardware for 1 3/8" Doors
Bypass Hardware for 1 1/2" Doors
(in order of appearance in the video)
Thickness Planer
Miter Saw
Table Saw
Magnetic Featherboard
Random Orbital Sander
Pocket Hole Jig
Portable Drill
24" F Clamps
Quick Grip Bar Clamps
Impact Driver
Measuring Tape
Handheld Router
Router Rabbeting Bit
Oscillating Multitool
Chisels
Flush Cut Saw
Putty Knife
Router 1/16" Round Over Bit
Jigsaw
Squeegee
Centerpunch
Ratcheting Screwdriver
If you liked the video be sure to give it a thumbs up on YouTube and I'd love to hear any questions or thoughts about making the frosted glass doors that you might have so be sure to let me know in the comments section!
If you're not already a subscriber consider subscribing and if you want to see more projects like this one be sure to check out my other projects on this site!
Until next time, Go Billd Yourself!
Don’t miss a thing!
Subscribe to get the latest content
How to Install Recessed Lighting
Lighting really helps to set the mood and energy of a space and the lighting in my kitchen was too bright, too focused in one place, and just too ugly to stay the way it was! It made for an uninviting kitchen, so I changed it. In this video I show you how I replaced my ugly existing kitchen light with recessed lighting! It looks fantastic and really brings a new energy to the kitchen. Let me show you how to do it!
Disclaimer: The following post contains affiliate links. If you purchase a product through one of the links, I may receive a small commission (at no cost to you) that I can use to feed the platypus. And it’s always hungry.
(most materials available at your local home improvement store)
6 in LED Recessed Lighting
14/2 Romex Cable
3/8 in Push-In Connector for 1/2 in Knockout
If you liked the video be sure to give it a thumbs up on YouTube and I'd love to hear any questions or thoughts about installing the recessed lighting that you might have so be sure to let me know in the comments section!
If you're not already a subscriber consider subscribing and if you want to see more projects like this one be sure to check out my other projects on this site!
Until next time, Go Billd Yourself!
Don’t miss a thing!
Subscribe to get the latest content
Making a Custom Wall Clock
I don’t really know why I decided to make a custom wall clock, I just lost track of time one day and have been looking for it since.
In this video, we’re making a custom wall clock primarily using a scroll saw to cut out the clock face and whatever you want to feature in the center. Naturally, I chose our platypus friend! After watching, you’ll be able to recreate a similar clock that you can further customize how you see fit!
Resources:
Disclaimer: The following post contains affiliate links. If you purchase a product through one of the links, I may receive a small commission (at no cost to you) that I can use to feed the platypus. And it’s always hungry.
(most materials available at your local home improvement store)
1/2" Oak Plywood
1/4" Maple Plywood
Oak Edge Banding
Painters Tape
Spray Adhesive
Sanding Sticks
Spray Paint
Pre-Stain Conditioner
Stain (various shades)
Wood Glue
Superglue
Double Sided Tape
Sawtooth Hangers
Satin Polyurethane Spray
Clock Movement
(in order of appearance in the video)
Table Saw
Router
Router Circle Cutting Jig
Iron
Utility Knife
Edge Banding Trimmer
Random Orbital Sander
Spring Loaded Centerpunch
Portable Drill
Scroll Saw
Drill Press
Bench Sander
Bench Vise
Nylon Vise Jaw Covers
Rotary Tool
Drum Sander Bits
Artist Brushes
Wood Glue Brush
Router 3/8" Pattern Bit
Screwdrivers
If you liked the video be sure to give it a thumbs up on YouTube and I'd love to hear any questions or thoughts about making the clock you might have so be sure to let me know in the comments section!
If you're not already a subscriber consider subscribing and if you want to see more projects like this one be sure to check out my other projects on this site!
Until next time, Go Billd Yourself!
Don’t miss a thing!
Subscribe to get the latest content


