How to Restore a Rusted Mower Deck (and prevent it from happening again!)
Give new life to your old mower deck!

Most mower decks are covered in a coat of paint which will protect the deck from rust as long as you never, you know, actually use the mower as a mower. As soon as the blade kicks up a few rocks/pinecones/twigs against the underside of the deck you can say bye bye to your shiny paint job. And once wet grass begins to cake on that exposed metal it’s not long before you’ve got an ideal situation for rust to take over. It’s best to mow when the grass is dry, but if you live in a humid area (NC summers eek) and your grass is still wet even when mowing in the evening after a week with no rain… dry isn’t always an option.
I got this mower 6 years ago and have pretty much neglected to take care of the deck since. I knew it had some rust taking place on the underside but didn’t know how bad it was. The rest of the mower shows no signs of slowing down anytime soon, so I wanted to restore the rusting deck to prevent it from rusting all the way through and having to replace the mower entirely. Mowers are kind of expensive!
In this project we’re going to not only stop more rust from occurring but also protect the mower so it doesn’t happen again!
Disclaimer: The following post contains affiliate links. If you purchase a product through one of the links, I may receive a small commission (at no cost to you) that I can use to feed the platypus. And it’s always hungry.
(most materials available at your local home improvement store)
Rust Converter
Primer
Truck Bed Coating
Anti-Seize
Non Stick Graphite Spray
(in order of first use in the project)
Impact Driver
Scraper
Face Shield
Respirator
Knotted Wire Cup Brush
Angle Grinder
Wire Wheels for Drill
Portable Drill
This post was published during the spring/early summer but that’s a product of me having a content backlog, not when I recommend doing this work! I did this over the winter between mowing seasons and highly recommend you do the same. Anyway, let’s get started!
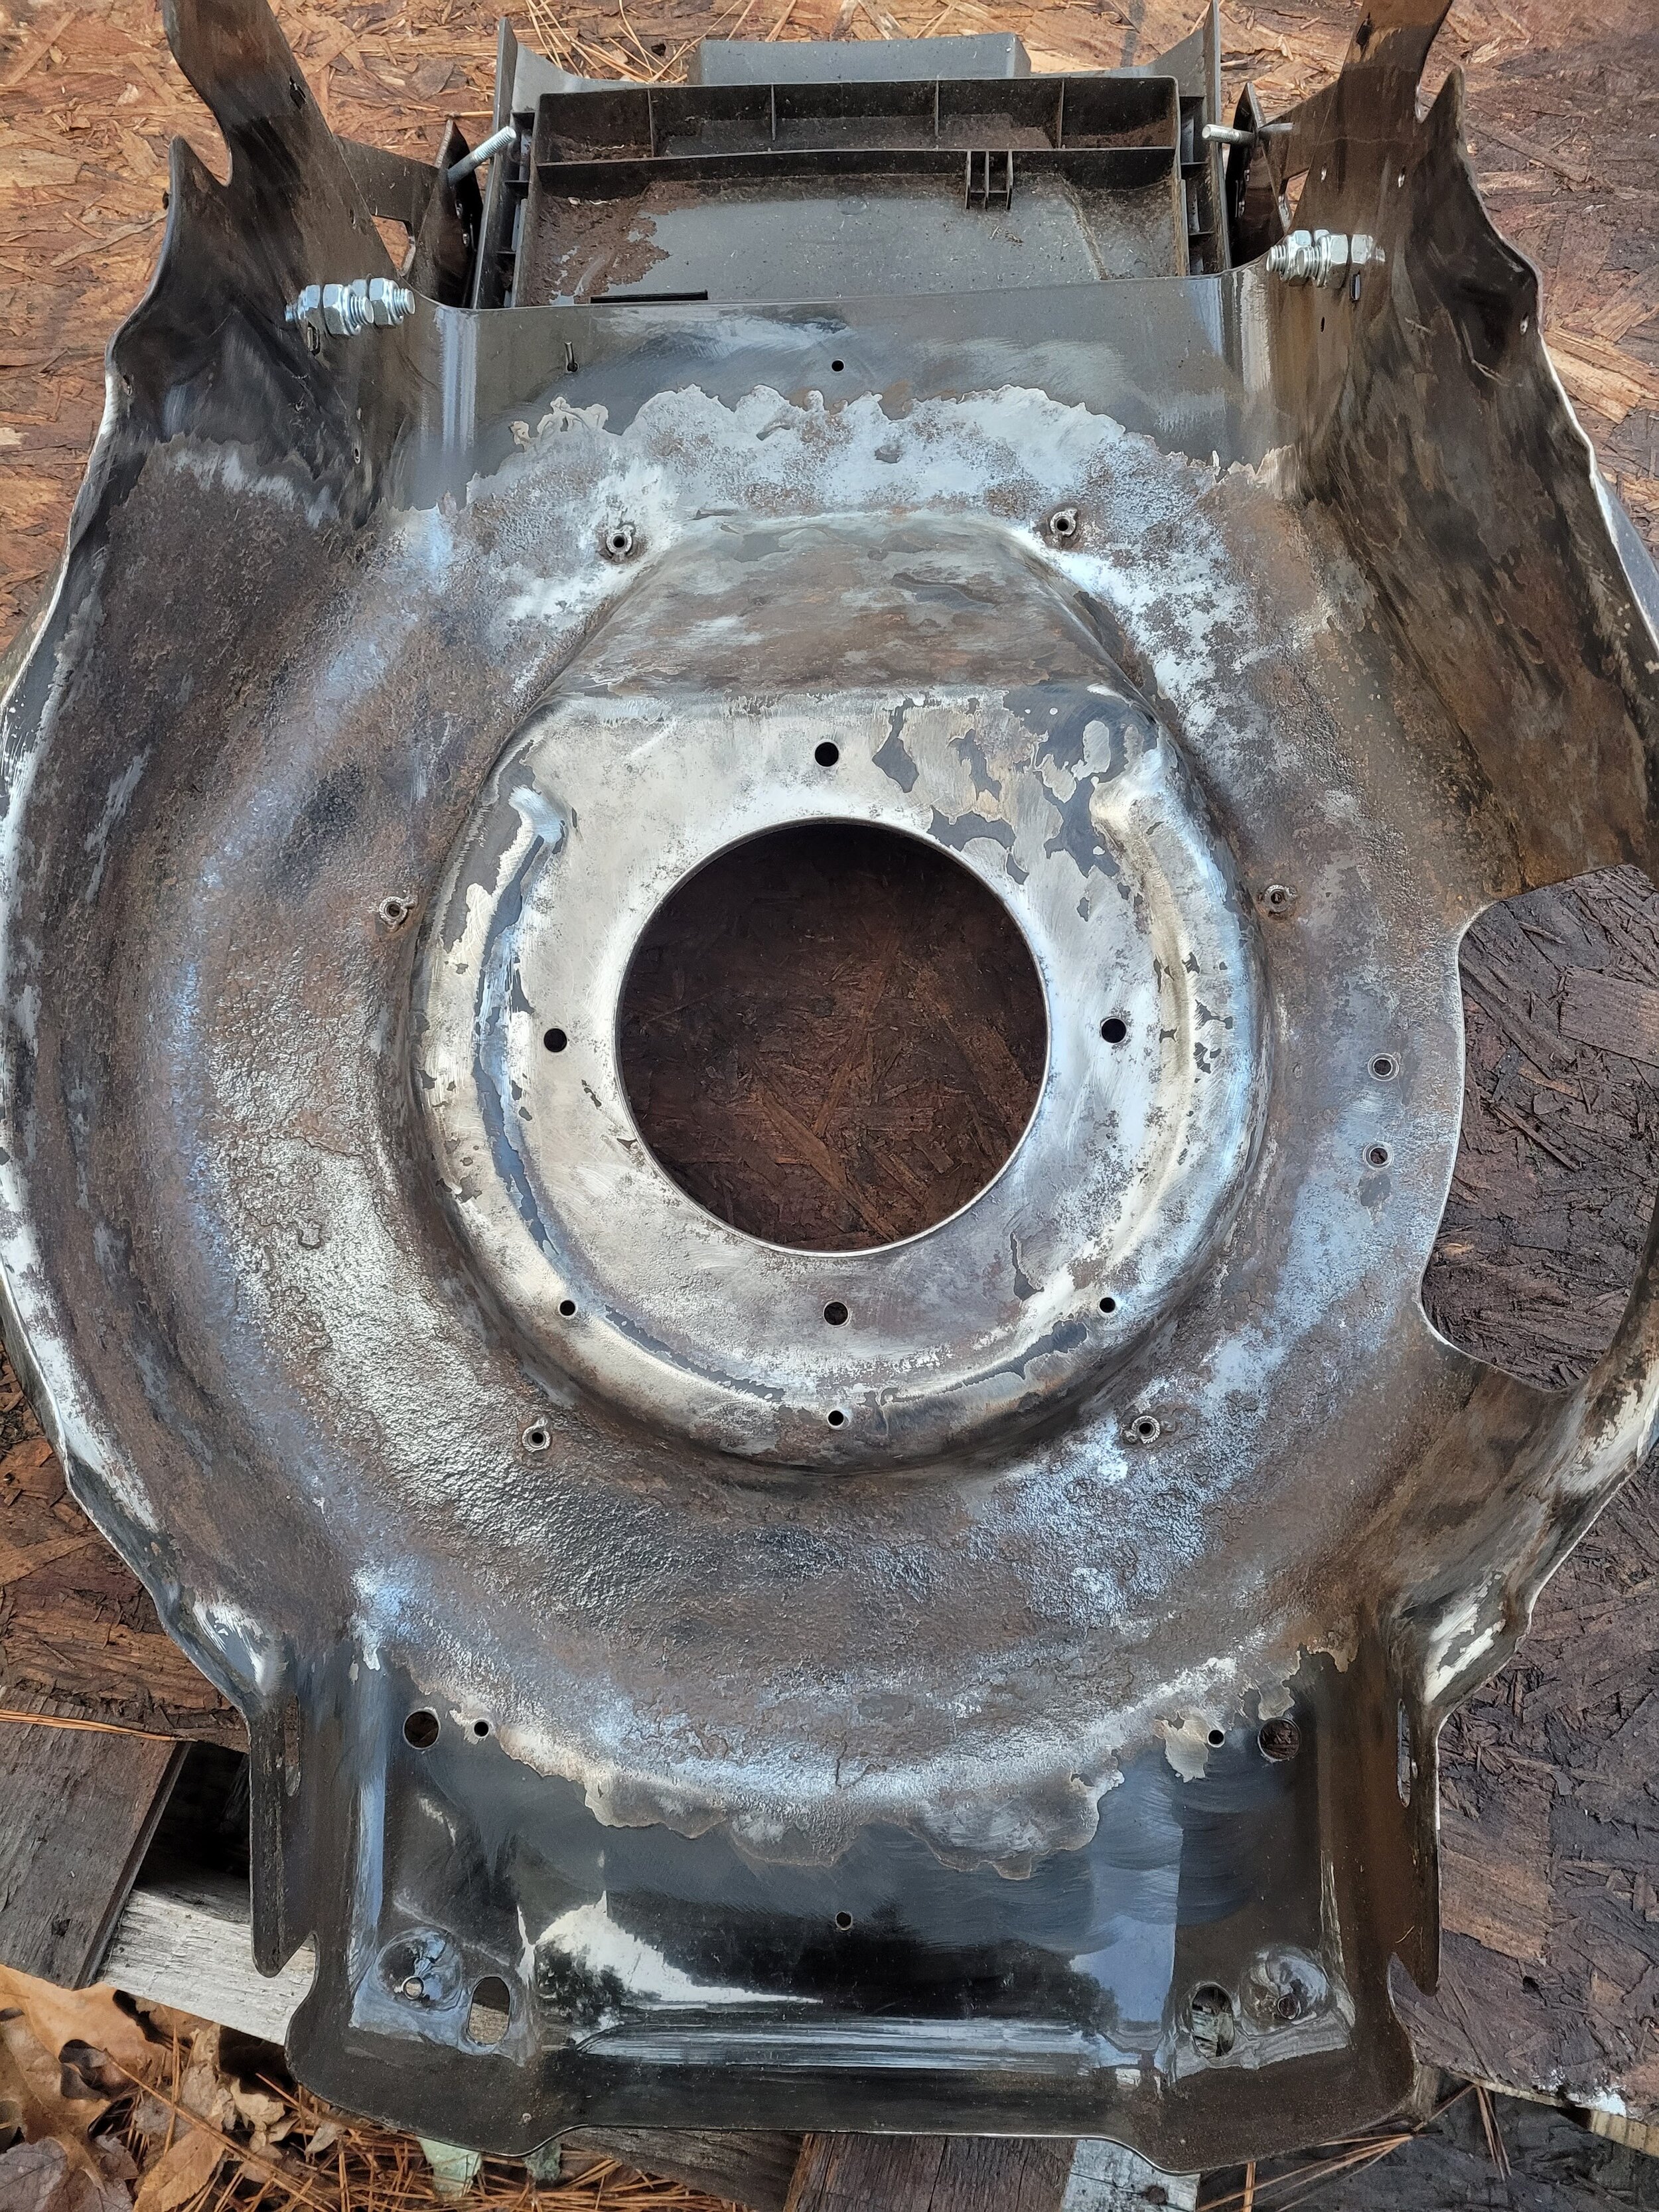
Ooooooohhhh, so that’s what 6 years of neglect look like. And this was after removing most of the caked on grass…

Before I can restore the deck I needed to remove the engine/wheels/height adjustment mechanism, etc. The procedure for doing this is going to vary a lot for every different mower so I won’t get into the details here.
If you have a gas lawnmower I suggest you run all the gas out of the mower before doing this so gas doesn’t leak out of the engine/tank. My mower is electric so I ran the batteries down in my mower to prevent electrical stains from getting on everything… /s

If you have rusted/stubborn bolts and screws (as I did), I find that setting an impact driver/wrench set to its lowest torque setting and hammering on the bolt for a while very useful for breaking them free without snapping the bolt.

I strongly suggest taking tons of pictures and grouping small parts into labeled snack bags (including diagrams for more complicated assemblies). It always seems like you’re going to remember how it all goes together but then a 2 day project gets stretched out over a month because of competing priorities… and crap! Where does that tiny screw go?

Once I had removed all the pieces from the deck that I didn’t want to get water or paint on I used a scraper to remove the loose paint and grass.

Then I pressured washed the deck and other plastic parts outside to remove the stuck on grass. In hindsight this probably wasn’t a necessary step given what I did next.

Once dry, I started removing the rust, flaking metal, and loose paint with a knotted wire cup brush on my angle grinder. Be sure to do this somewhere well-ventilated (outside) and wear the appropriate safety gear!

See, doesn’t this make you feel safe?

I switched to a wire wheel on a drill for the areas I couldn’t get to with the angle grinder. There was some significant pitting of the metal that had begun to occur.

Here’s the mower deck after removing as much flaky metal, rust, and loose paint as I could, diminishing returns and all. The rust was a lot worse in the curved sections of the deck where the grass had caked on.
The deck was ready for paint so I sprayed on 2 coats of rust converter which seals the rust and turns it into a paintable surface. This likely won’t completely stop the rust, but it should slow it down a whole lot so that the mower lasts for many years to come.

I added 2 coats of a flat gray primer on top of the rust converter.

I then sprayed on 3 coats of truck bed coating. This should be a significantly more durable surface than normal paint and hold up much better when hard things get thrown against the bottom of the deck. That’s the hope anyway!

Once it was dry I began reassembling the mower in the reverse order that I took it apart. I referenced my pictures (A LOT) as it was nearly a month at this point from when I first took the mower apart.

I put anti-seize on any screws and bolts that I had trouble getting out the first time so if/when it comes time to do this again, it should be easier to get the mower apart.

Some time later and the mower is completely back together! No idea if it works at this point but it at least looks like a mower anyway. I believe some gas mowers aren’t supposed to be run without the blade attached so I wouldn’t test it quite yet unless you know it’s fine to do so.

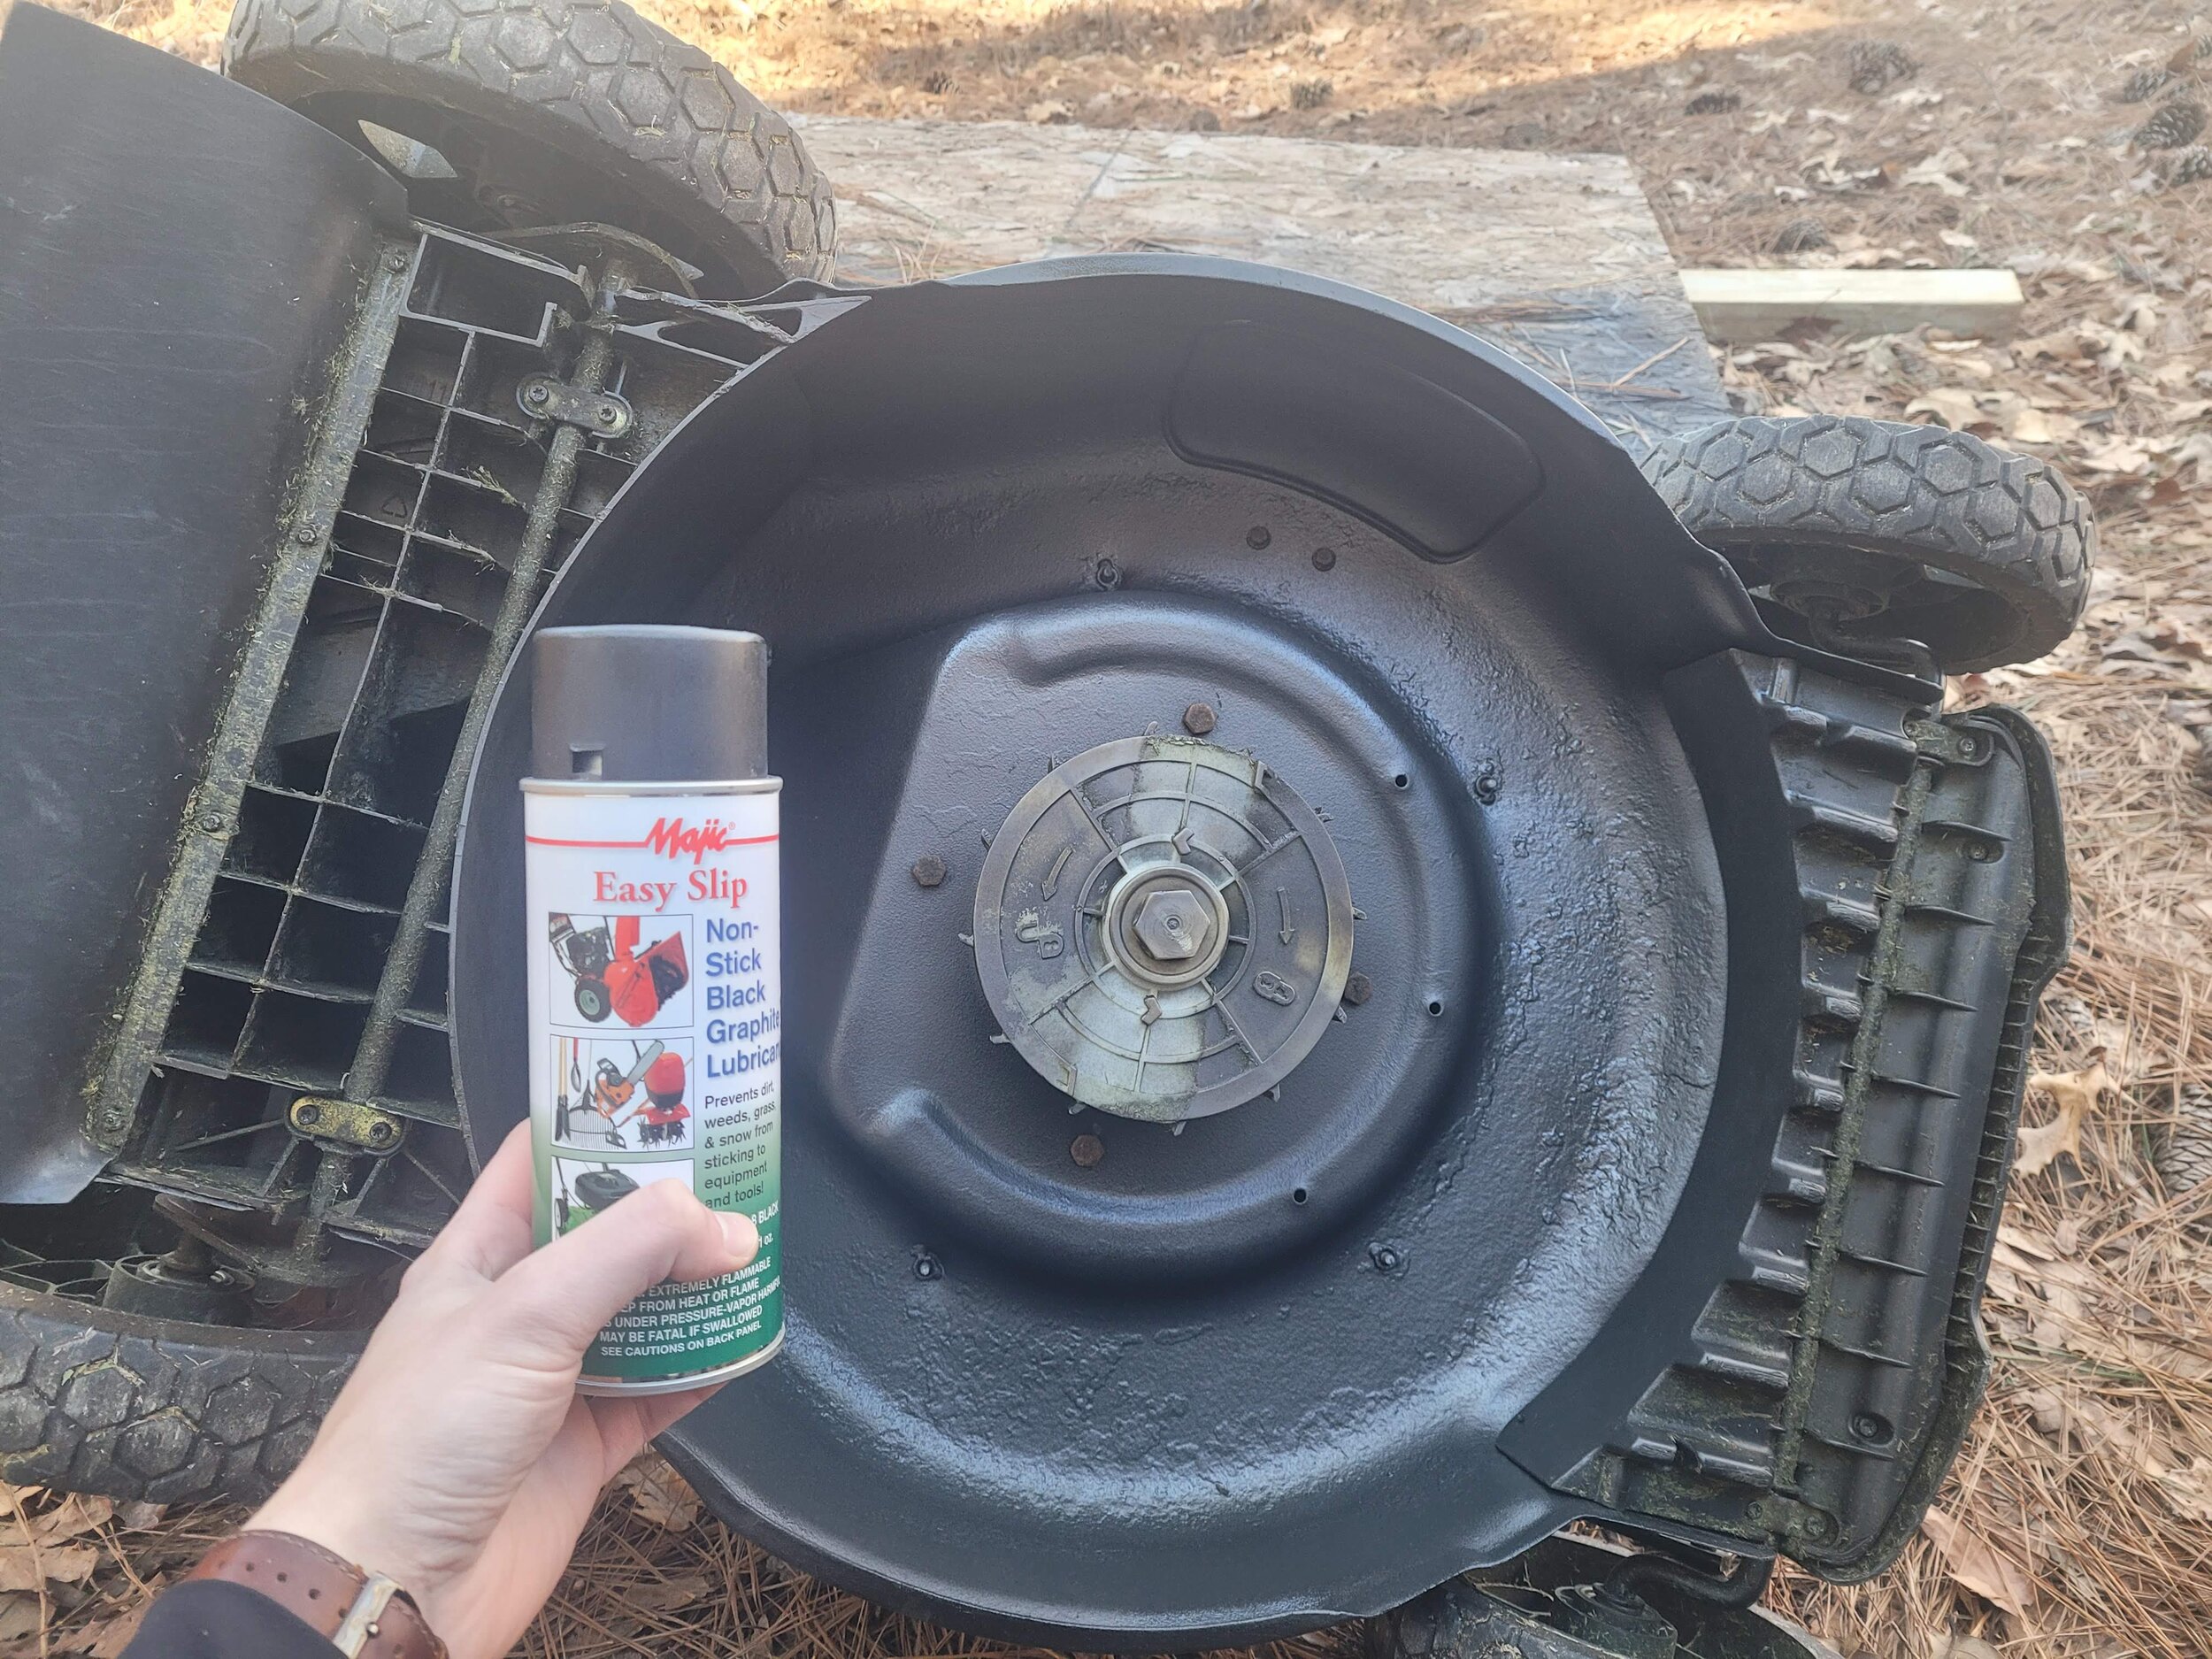
With the mower back together (minus the blade) I sprayed on 3 coats of non stick graphite lubricant spray to all of the surfaces on the underside of the mower. The spray is supposed to (in theory) keep grass or anything else from sticking. We shall see!
There were no directions on the can for recoat or cure times but from doing some research I found that that it should be recoated after about 8 hours and to allow 48 hours before use after the last coat. (So plan ahead as this takes a few days!)
I reinstalled the blade and tested the mower, and it still works! Which is great as it’s never fun to ‘repair’ something and break something else along the way.

After using the mower once, here’s what it looks like. It’s only one time, but way less grass than normal stuck to it and the undercoating seems to be holding up really well. It’s early, but I’m calling this a success!
I’ll come back and update this post with how the coatings are holding up after this mowing season!

I'd love to hear any questions or thoughts about restoring the mower deck that you might have so be sure to let me know in the comments!
If you're not already subscribed to Project Billd content you can do that here and if you want to see more projects like this one be sure to check out my other projects on this site!
Until next time, Go Billd Yourself!
Don’t miss a thing!
Subscribe to get the latest content